


Table of contents
- Introduction:
- Prerequisites:
- Create a Free Tier RDS Instance of MySQL
- Create an EC2 Instance
- Set up the DB credentials.
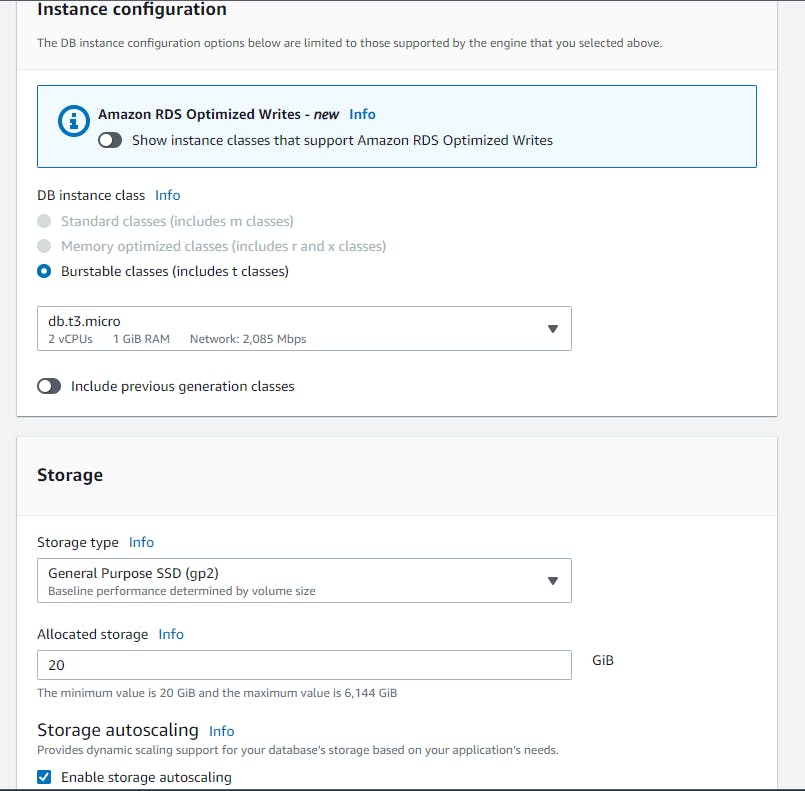
- Select the database size.
- Select the EC2 Compute connect as we are going to access our database from EC2.
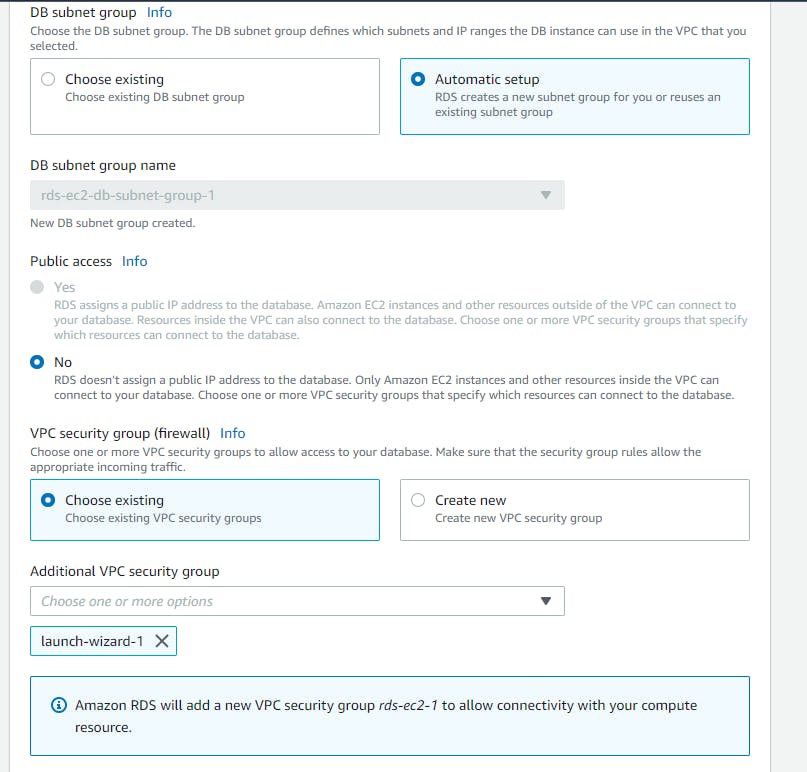
- Choose the VPC that you have created already while spinning EC2 instance.
- Create an IAM Role with RDS Access
- Conclusion:
Introduction:
Amazon Web Services (AWS) offers a wide range of services for cloud computing, including Amazon RDS (Relational Database Service) and Amazon EC2 (Elastic Compute Cloud). In this tutorial, we will walk through the step-by-step process of creating a Free Tier RDS instance of MySQL and connecting it with an EC2 instance. This setup will allow you to leverage the power of a managed relational database and an elastic virtual server to build scalable and reliable applications.
Prerequisites:
- An AWS account: Before you begin, make sure you have an AWS account. If you don't have one, sign up for a free tier account on the AWS website (aws.amazon.com).
Create a Free Tier RDS Instance of MySQL
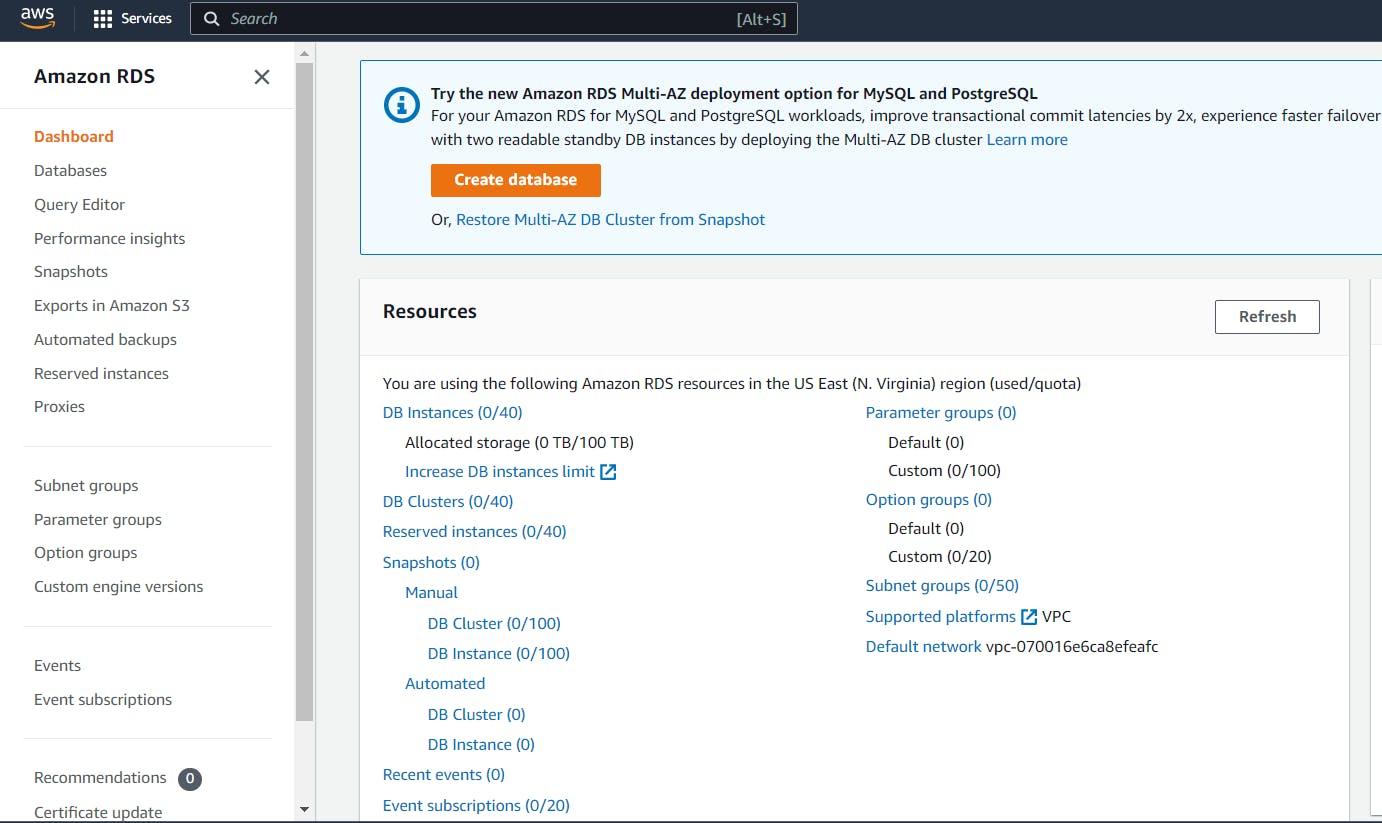
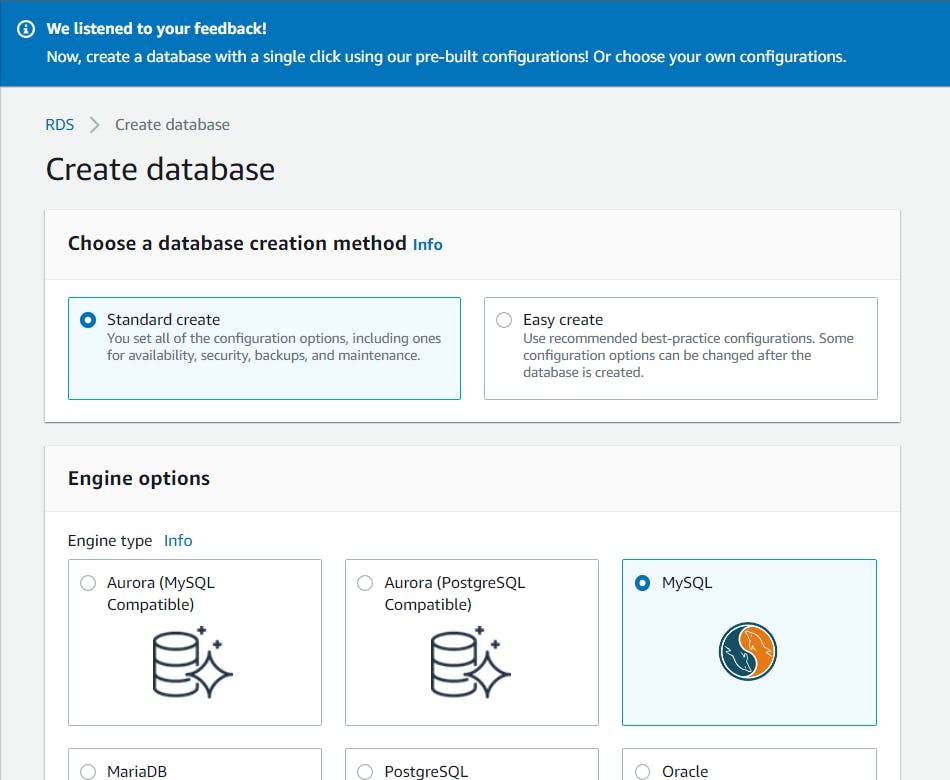
First, we’ll create a free tier RDS instance of MySQL. To do this, log in to the AWS Management Console and navigate to the RDS service. From there, click on the “Create database” button and select “MySQL” as the engine type. Make sure to select the “Free tier” template.
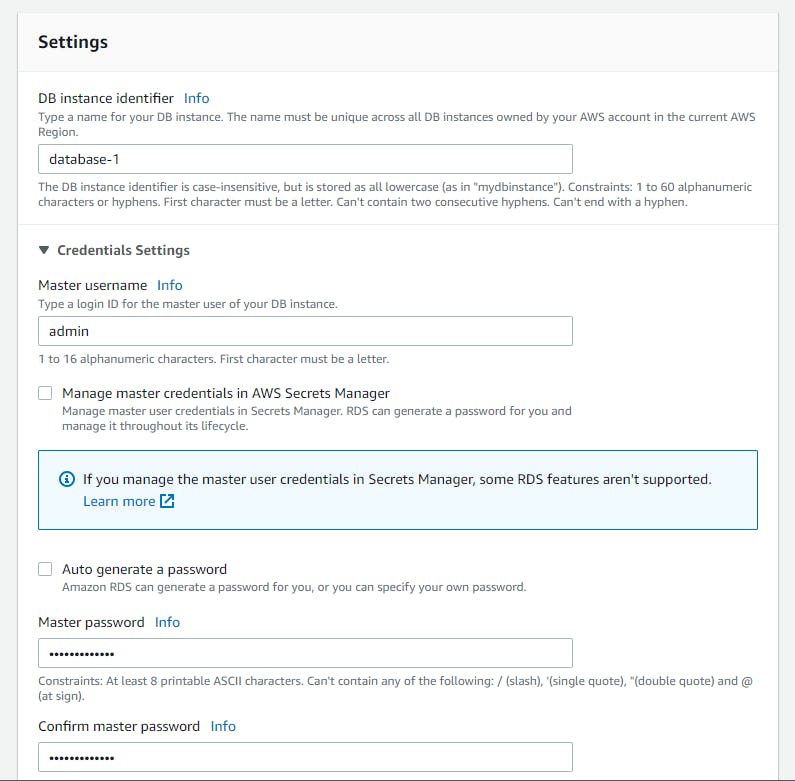
When creating your RDS instance, you’ll need to provide some basic information such as the DB instance identifier, master username, and master password. You’ll also need to select a VPC and subnet group for your RDS instance. Make sure to select a VPC and subnet group that allows communication between your EC2 instance and your RDS instance.
Once you’ve provided all the necessary information, click on the “Create database” button to create your RDS instance. It may take a few minutes for your RDS instance to become available.
- Create a Free tier RDS instance of MySQL
Navigate to the RDS section in the AWS management console and click to Create a database.
Select the Engine option which is the type of database to setup. We will select MySQL as per our task.
Create an EC2 Instance
Next, we’ll create an EC2 instance. To do this, navigate to the EC2 service in the AWS Management Console and click on the “Launch Instance” button. Follow the prompts to select an Amazon Machine Image (AMI) and instance type.
When selecting an AMI, make sure to choose one that includes the necessary tools and libraries for connecting to a MySQL database (e.g., a Linux AMI with the MySQL client installed). When selecting an instance type, choose one that meets your performance and cost requirements.
Next, you’ll need to configure your instance details. Make sure to select a VPC and subnet that allows communication between your EC2 instance and your RDS instance. You’ll also need to select a security group that allows inbound traffic on port 22 (for SSH access) and port 3306 (for MySQL access).
Once you’ve configured your instance details, click on the “Review and Launch” button to review your settings. If everything looks good, click on the “Launch” button to launch your EC2 instance. It may take a few minutes for your EC2 instance to become available.
Select free-tier as the template.

Set up the DB credentials.
Select the database size.
Select the EC2 Compute connect as we are going to access our database from EC2.
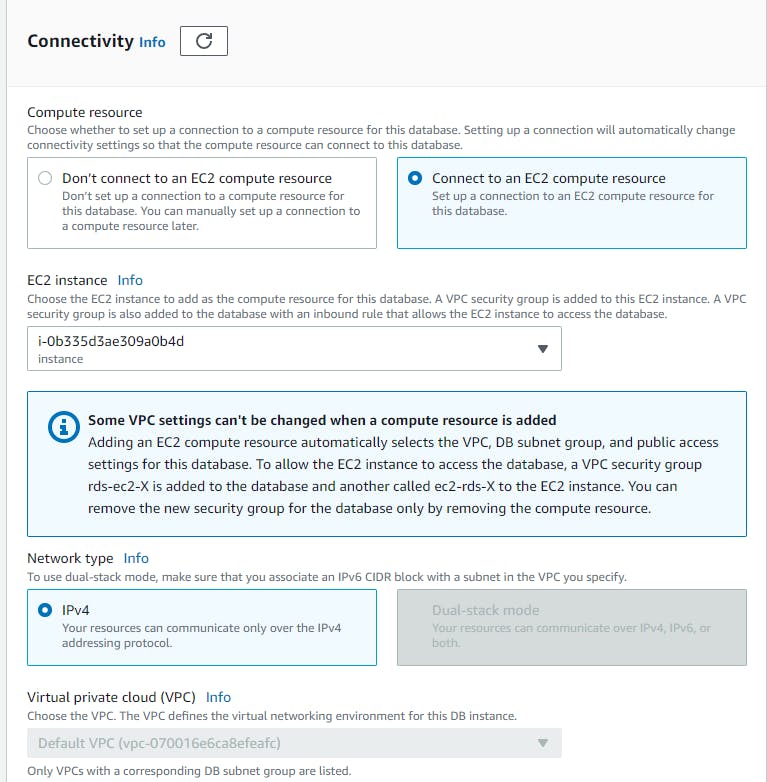
Choose the VPC that you have created already while spinning EC2 instance.
Now the new database is spun up.

An instance is created and attached to the database in the above step.
Create an IAM Role with RDS Access
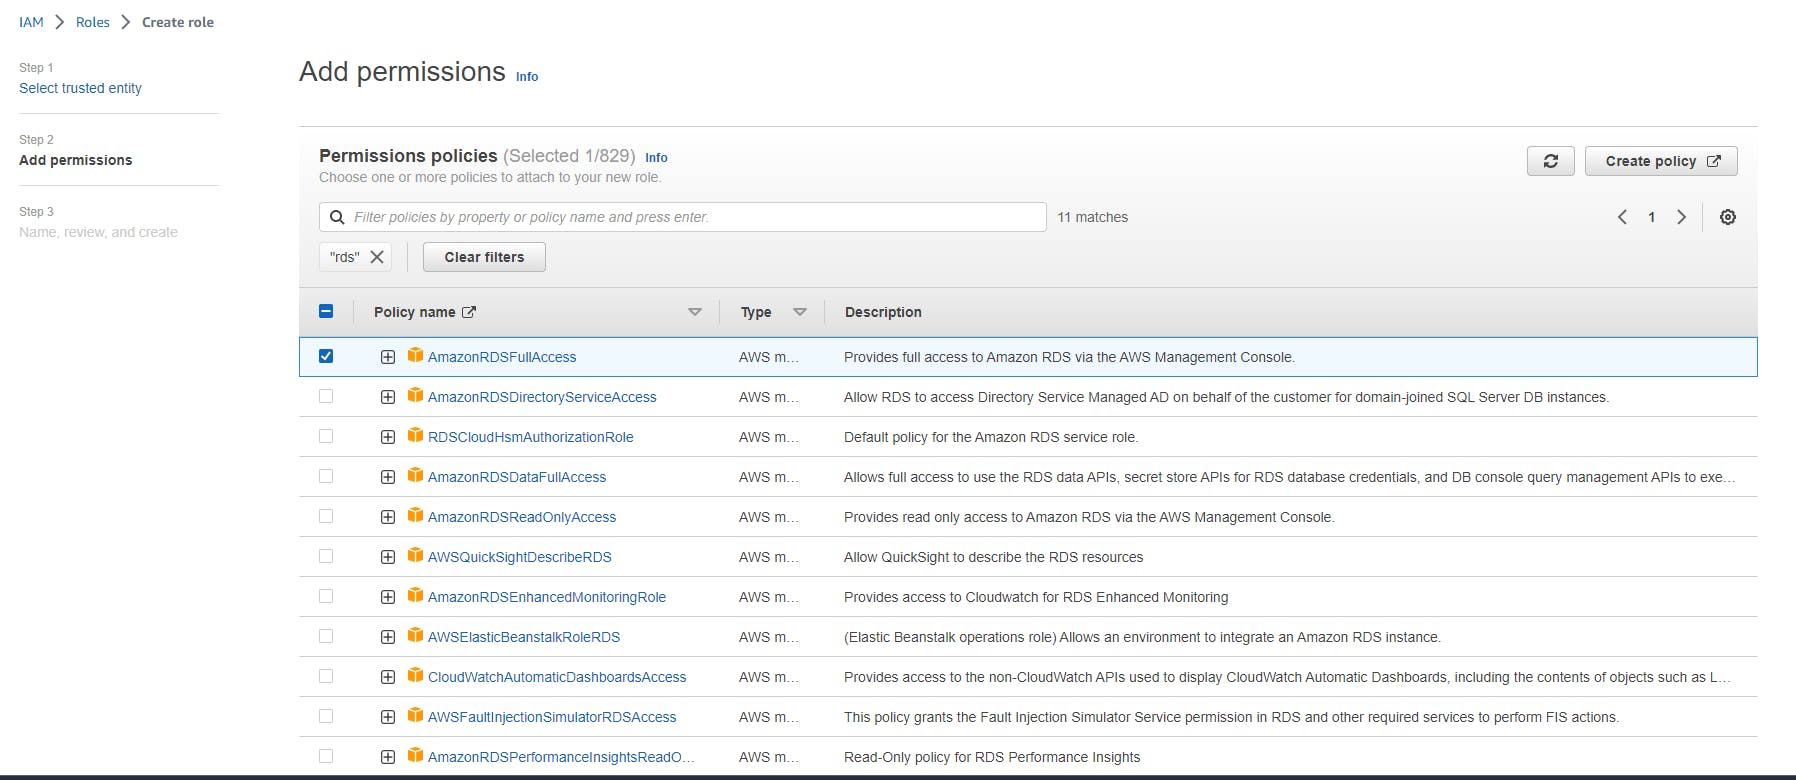
Now we’ll create an IAM role with RDS access. To do this, navigate to the IAM service in the AWS Management Console and click on the “Roles” link in the left-hand navigation menu. Click on the “Create role” button and select “EC2” as the trusted entity. On the next screen, search for and select the “AmazonRDSFullAccess” policy.
An IAM role is an AWS identity that you can use to grant permissions to AWS services (such as EC2) to access other AWS resources (such as RDS). In this case, we’re creating an IAM role that allows our EC2 instance to access our RDS instance.
Once you’ve selected the “AmazonRDSFullAccess” policy, click on the “Next: Tags” button to add any tags (optional), then click on the “Next: Review” button to review your settings. If everything looks good, enter a name for your IAM role (e.g., “EC2-RDS-Access”) and click on the “Create role” button to create your IAM role.
Create a role in IAM.

Select the EC2 option.

Add RDS full access to the group.
Provide the role name and create the role now.
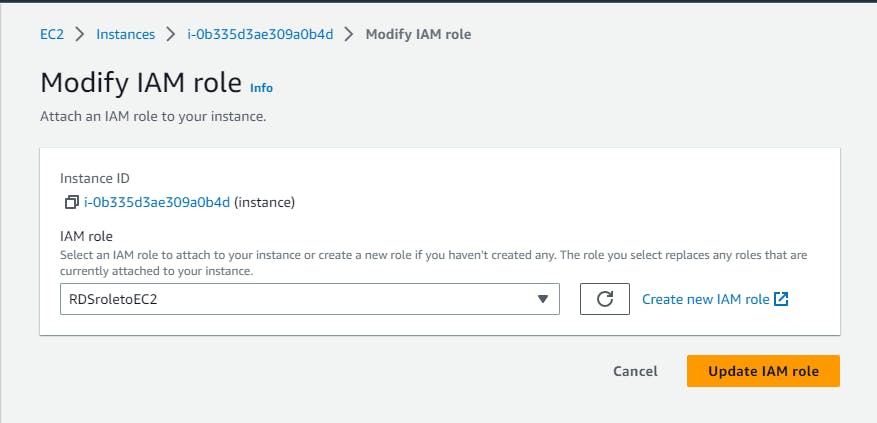
Navigate to your EC2 instance security settings and modify the IAM role.
Choose your created role to assign to EC2
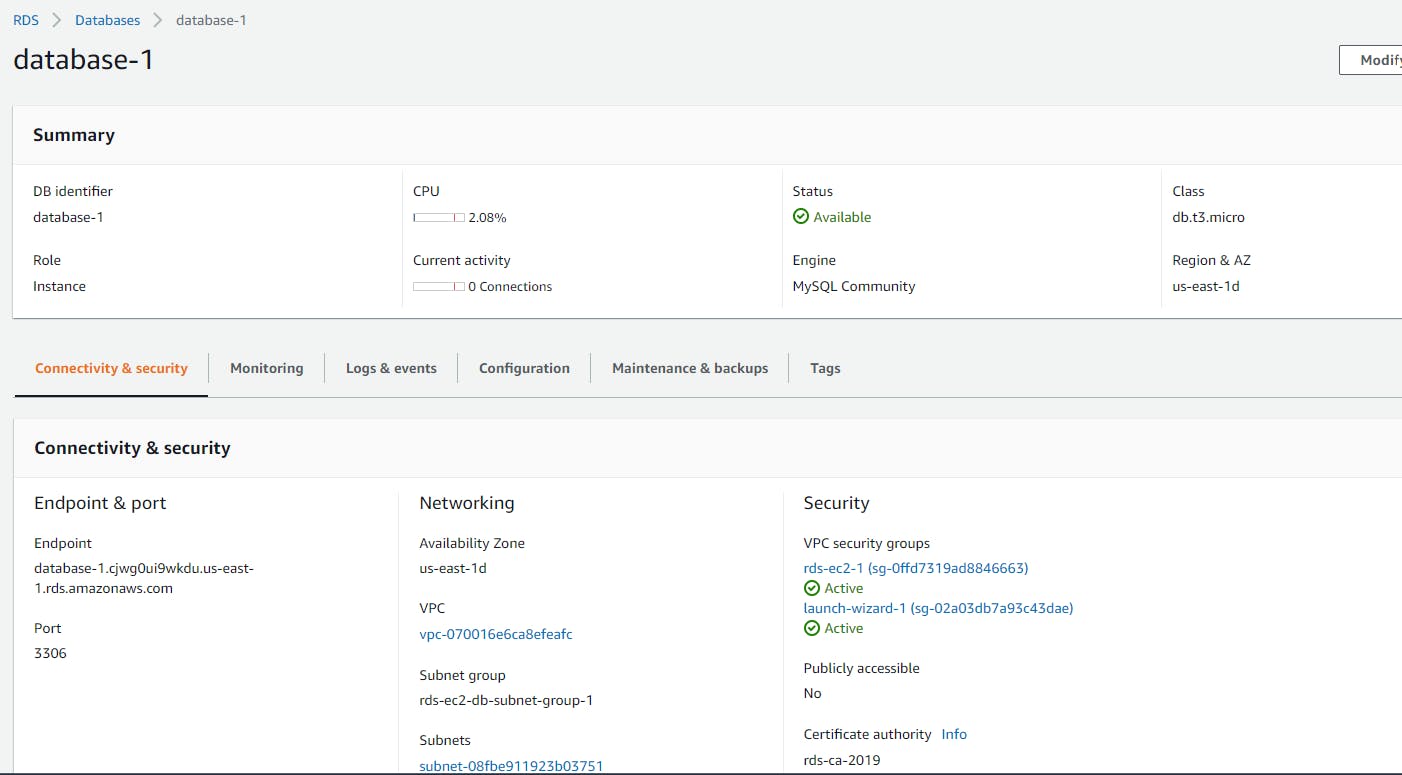
Once the RDS instance is up and running, get the credentials and connect your EC2 instance using a MySQL client.
Now navigate to your database and make note of Endpoint that is needed to connect RDS to EC2.
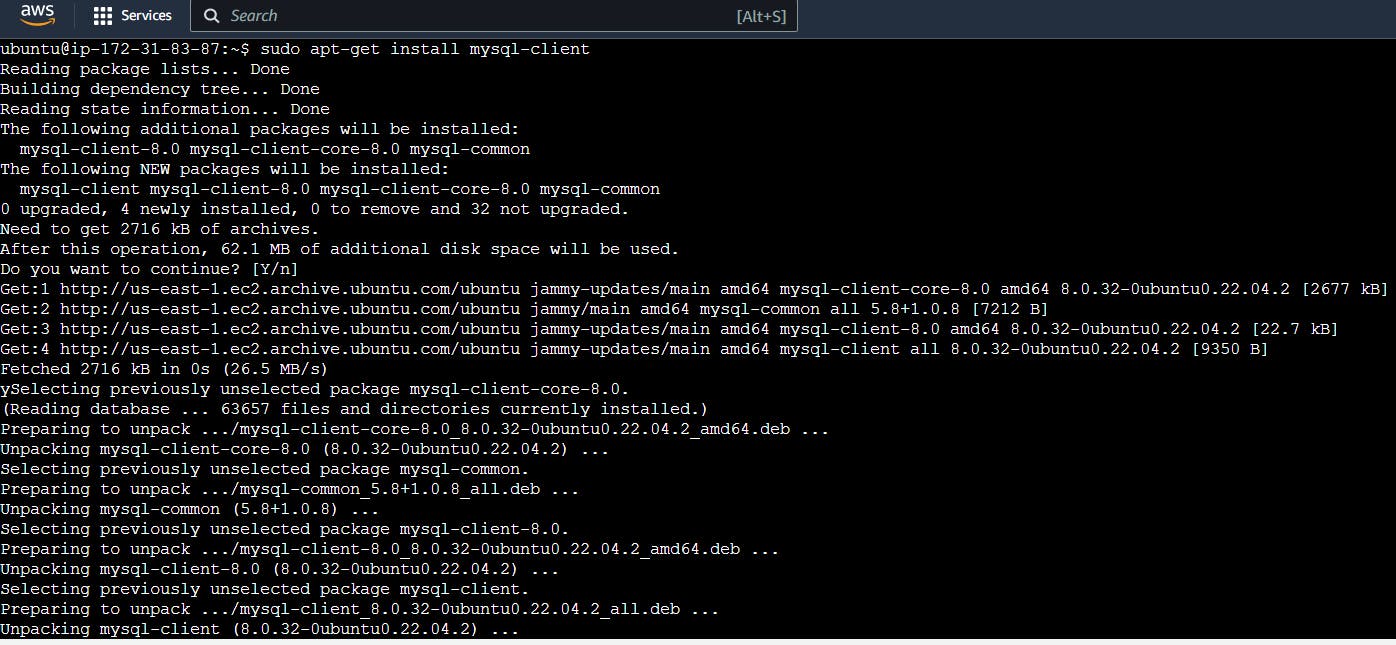
Install MySQL client on EC2.

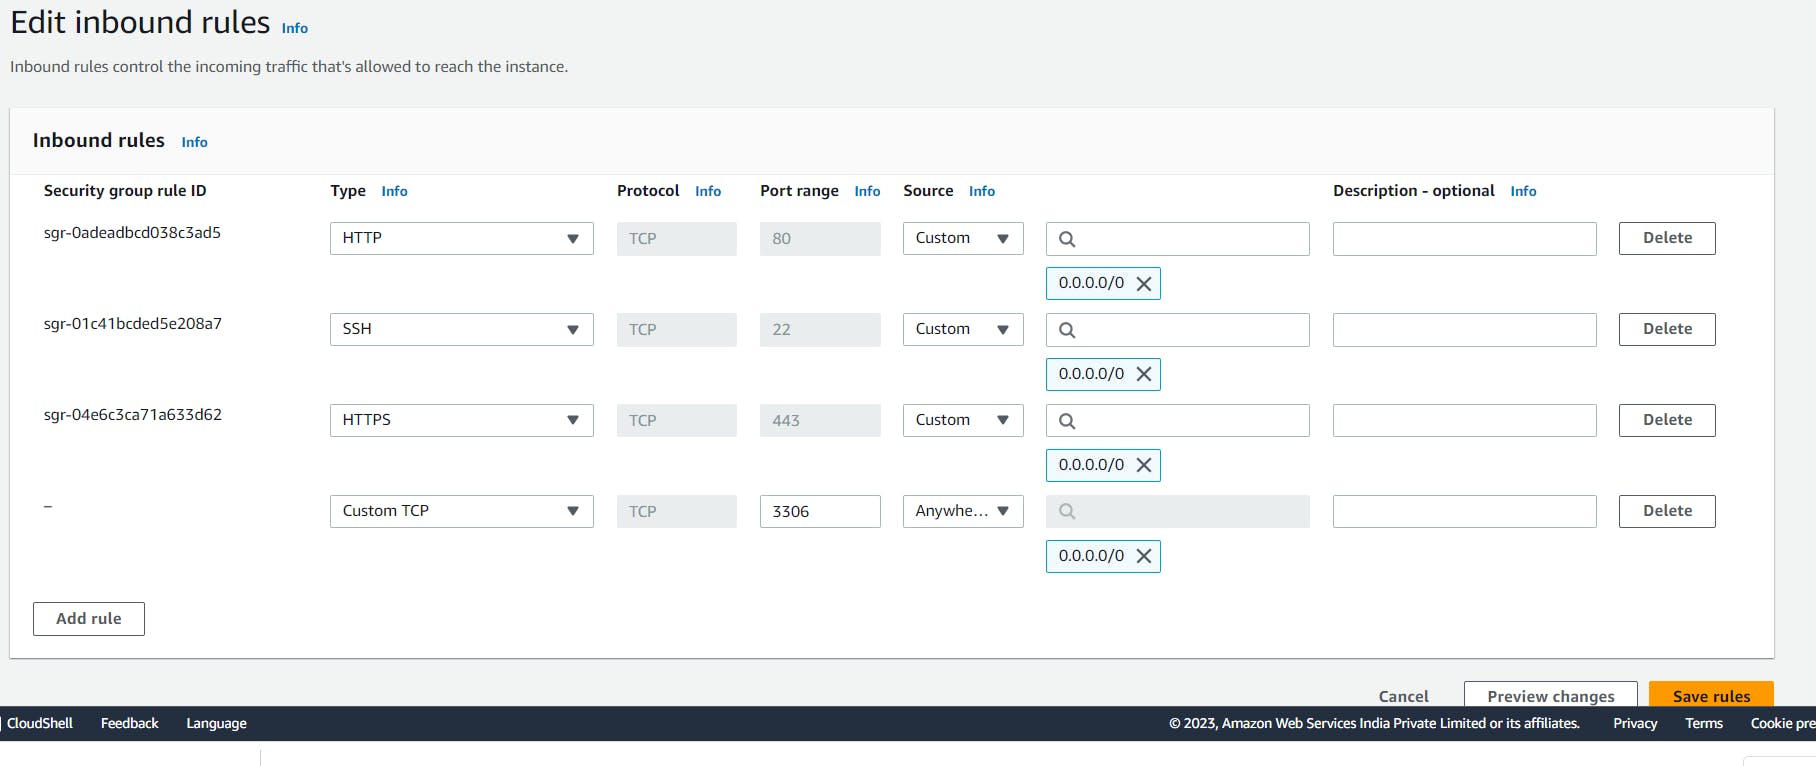
The database will be using a 3306 port which you can open in the inbound rule of Instance.
Use the below command to connect to the RDS. You can see now SQL is connected.
mysql -h <enpointURL> -P <portno.> -u <username> -p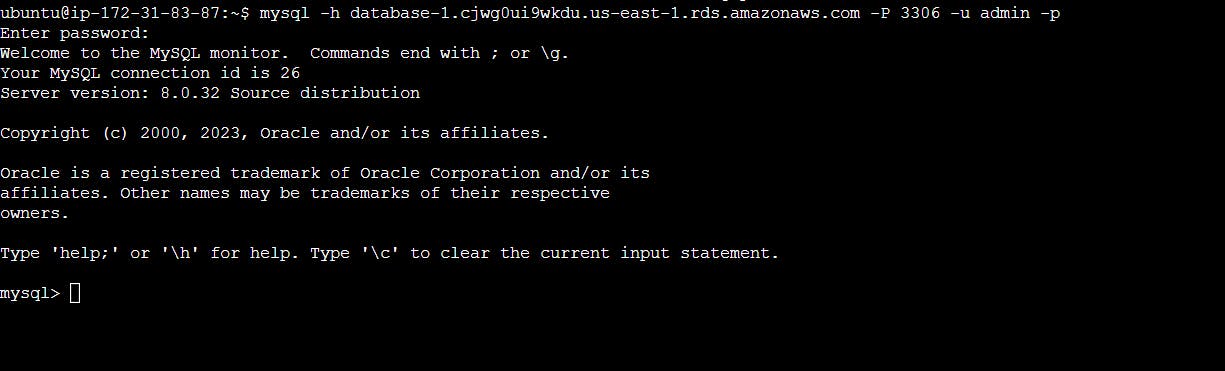
Conclusion:
By following this comprehensive guide, you have successfully created a Free Tier RDS instance of MySQL, launched an EC2 instance, and connected the EC2 instance with the RDS database using an IAM role. This setup allows you to use the power of AWS services to build and deploy scalable applications with ease.

To connect with me - https://www.linkedin.com/in/subhodey/