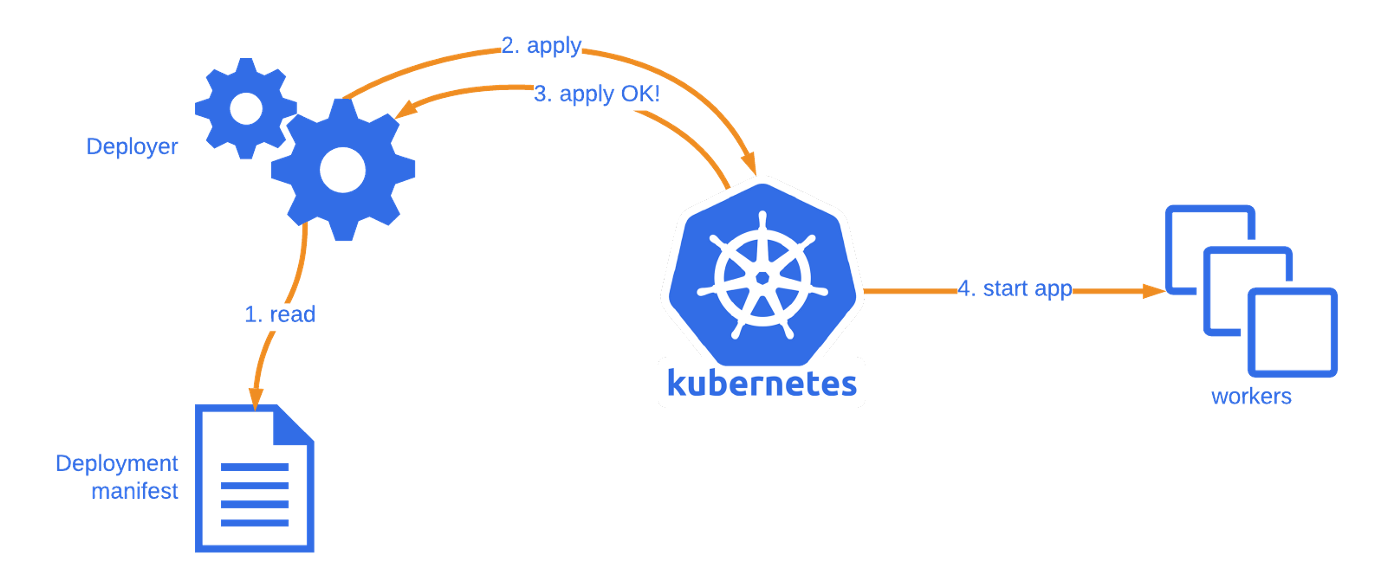
In this blog post, we will explore how to deploy a sample todo-app on a Kubernetes cluster using the "Auto-healing" and "Auto-scaling" features. We will create a deployment file and apply it to a Kubernetes cluster, specifically a Minikube cluster. The deployment will ensure that the desired number of replicas are running, automatically heal any failures, and scale the application based on resource utilization.
Prerequisites
Before we begin, ensure that you have the following prerequisites:
(you can check my these two previous blogs : kubernetes-part1 and kubernetes-part2
Kubernetes cluster: Set up a Kubernetes cluster, such as Minikube, on your local machine or use a cloud-based Kubernetes service.
Docker image: Prepare a Docker image for the todo-app or use an existing image. For this tutorial, we will use the image
rishikeshops/todo-app.
Step 1: Create the Deployment File
Let's start by creating a deployment file named deployment.yml to define our todo-app deployment. Open a text editor and enter the following YAML code:
apiVersion: apps/v1
kind: Deployment
metadata:
  name: todo-app
  labels:
    app: todo
spec:
  replicas: 2
  selector:
    matchLabels:
      app: todo
  template:
    metadata:
      labels:
        app: todo
    spec:
      containers:
      - name: todo
        image: rishikeshops/todo-app
        ports:
        - containerPort: 3000
In the above YAML code, we define a Deployment named todo-app with 2 replicas. The deployment ensures that there are always 2 instances of the todo-app running. We also specify the container image rishikeshops/todo-app and expose port 3000 for the application.
Save the file as deployment.yml in your desired location.

Step 2: Apply the Deployment to the Kubernetes Cluster
Now that we have our deployment file ready, we can apply it to our Kubernetes cluster. Open a terminal or command prompt and execute the following command:
kubectl apply -f deployment.yml
This command applies the configuration defined in the deployment.yml file to the Kubernetes cluster. Kubernetes will create the necessary resources and ensure that the desired number of replicas of the todo-app are running.
Auto-Healing and Auto-Scaling
With the deployment in place, Kubernetes provides built-in features for auto-healing and auto-scaling.
Auto-Healing
Kubernetes monitors the health of the todo-app instances and automatically restarts any failed instances. If a pod becomes unresponsive or crashes, Kubernetes detects it and replaces it with a new healthy instance, ensuring high availability and reliability of the application.
Auto-Scaling
As the load on the todo-app varies, Kubernetes can automatically scale the application by adjusting the number of replicas. It monitors resource utilization, such as CPU and memory, and based on predefined thresholds, Kubernetes can scale up or down the number of replicas to ensure optimal performance and resource utilization.
Conclusion
In this blog post, we explored how to deploy a sample todo-app on a Kubernetes cluster using the "Auto-healing" and "Auto-scaling" features. We created a deployment file specifying the desired configuration and applied it to the Kubernetes cluster. With Kubernetes handling auto-healing and auto-scaling, our todo-app can automatically recover from failures and adapt to changing workload demands.
By leveraging these powerful features, you can ensure the availability, resilience, and scalability of your applications running on Kubernetes. Start exploring and harnessing the full potential of Kubernetes for your deployments today!
Remember to check out the deployment.yml file for the complete YAML configuration used in this tutorial.
Happy Kubernetes deployment!

To connect with me - https://www.linkedin.com/in/subhodey/

