


Introduction:
Say hello to CodeDeploy, the ultimate deployment service that works its magic on Amazon EC2 instances, on-premises instances, serverless Lambda functions, and Amazon ECS services.
With CodeDeploy by your side, deploying application content to servers becomes a breeze. It effortlessly handles content stored in Amazon S3 buckets, GitHub repositories, or Bitbucket repositories. Oh, and did we mention it can deploy serverless Lambda functions too? 😎
The best part? You don't need to tweak your existing code before diving into the world of CodeDeploy. It's ready to roll without any modifications.
Here's why CodeDeploy will be your best deployment buddy:
🚀 Swift Feature Releases: Say goodbye to slow rollouts! CodeDeploy helps you launch new features at lightning speed.
🔁 Easy Lambda Updates: Updating AWS Lambda function versions has never been smoother. CodeDeploy's got your back!
⏰ No More Downtime: Bid farewell to application deployment hiccups. CodeDeploy ensures a seamless experience.
🎭 Complexity, Be Gone: Updating applications becomes a piece of cake with CodeDeploy, minus the risk of manual errors.
And that's not all! CodeDeploy scales effortlessly, from deploying to a single instance to handling thousands with ease. It's your go-to deployment superhero for any infrastructure size.
Tasks
Task 1: Deploy index.html file on EC2 machine using nginx (you have to set up a CodeDeploy agent to deploy code on EC2)
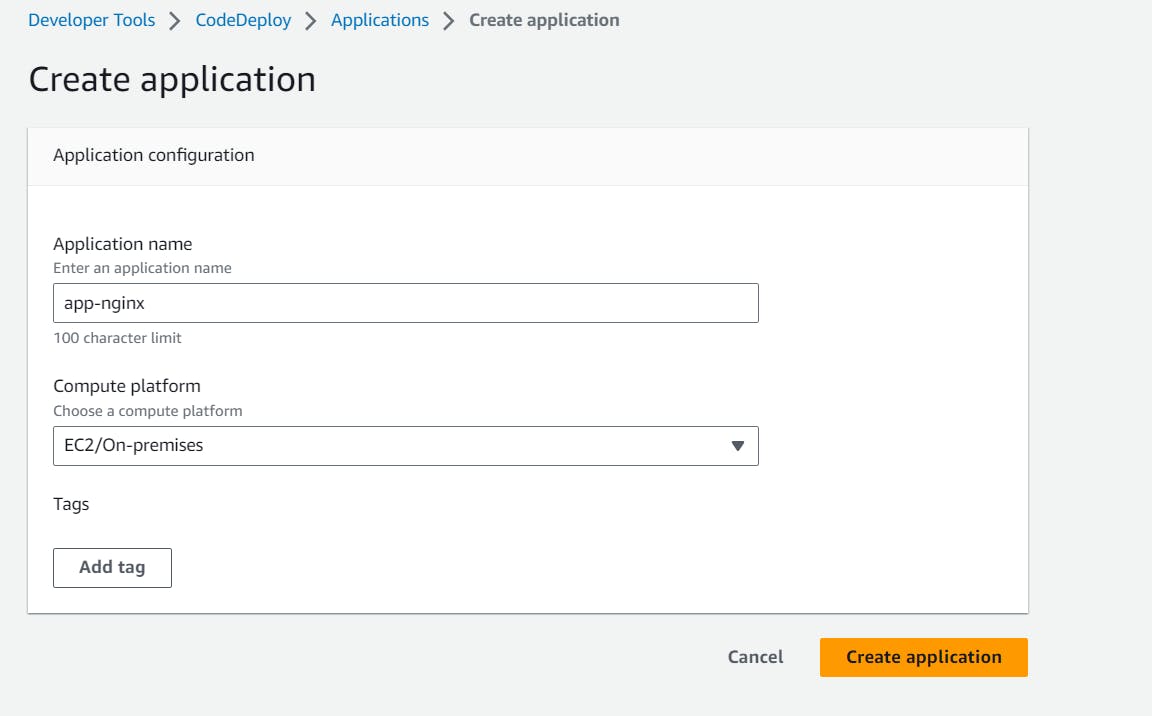
Let's create a CodeDeploy application:
Are you ready to embark on a deployment adventure with CodeDeploy? Let's get started by creating your very own application.
Navigate to CodeDeploy: Head over to the CodeDeploy console, where the magic happens.
Applications Await: Click on "Applications" in the console to explore your application possibilities.
Create Application: The moment has come! Click on "Create Application" to kickstart the process.

To establish seamless connections between CodeDeploy and other AWS services, we have a simple and effective approach: creating a service role in the IAM.
Let's dive in:
🧭 Navigate to Roles in IAM: Open up the IAM console and head straight to the "Roles" section. Here's where the magic begins!
🚀 Create a New Role: Click that "Create Role" button and get ready to elevate CodeDeploy's capabilities.
🔍 The Perfect Permissions: Now, let's grant the ideal permissions for our role:
AmazonEC2FullAccess: Provides comprehensive access to EC2, so CodeDeploy can work its magic.
AmazonEC2RoleforAWSCodeDeploy: A role tailor-made for CodeDeploy and EC2 integration.
AmazonS3FullAccess: Full access to Amazon S3 for seamless content handling.
AWSCodeDeployRole: A role dedicated to empowering CodeDeploy with its responsibilities.
AWSCodeDeployFullAccess: The key to unleashing CodeDeploy's full potential.
AmazonEC2RoleforAWSCodeDeployLimited: A special role that gives CodeDeploy just the right amount of access to EC2.
🚀 That's It! With these permissions in place, CodeDeploy is now fully equipped to establish rock-solid connections with other AWS services.


Change the trust entities :

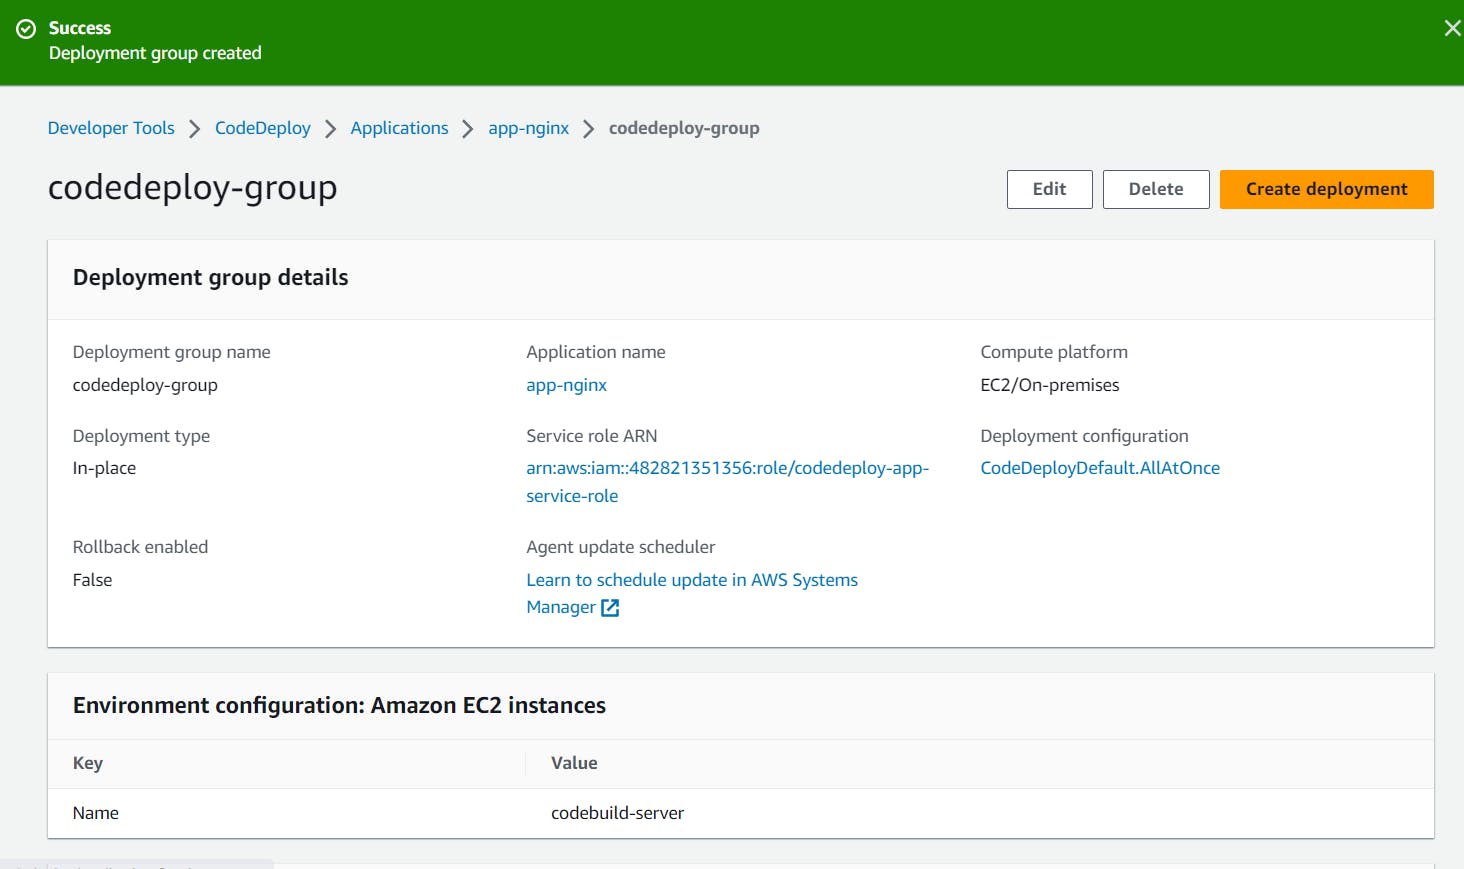
To get our index.html file up and running, let's create a powerful deployment group. Follow these steps:
Head over to the CodeDeploy console.
Navigate to the Deployment Groups tab, ready for action.
It's showtime! Click on "Create deployment group."

Deployment Group: codedeploy-group
Service Role: Choose the service role you created earlier, equipped with all the necessary permissions.
Deployment Type: Let's go with the "In-place" deployment strategy.
Environment Configuration: Opt for Amazon EC2 instances. Make sure to select the appropriate key and value to pinpoint the EC2 instance created specifically for this activity.
With this setup, you're all set to smoothly deploy your application.

Install AWS CodeDeploy Agent: Never
Disable the load balancing.
And click on create deployment group.
Now let us set up a CodeDeploy agent to deploy code on EC2.
The AWS CodeDeploy agent is like a magical software package that works its charm on instances within an Amazon EC2 Auto Scaling group or an individual Amazon EC2 instance. Its sole purpose is to pave the way for seamless application deployments on these instances by establishing a smooth connection with the AWS CodeDeploy service.
Install the CodeDeploy agent on your EC2 instance :
#!/bin/bash
sudo apt-get update
sudo apt-get install ruby-full ruby-webrick wget -y
cd /tmp
wget https://aws-codedeploy-us-east-1.s3.us-east-1.amazonaws.com/releases/codedeploy-agent_1.3.2-1902_all.deb
mkdir codedeploy-agent_1.3.2-1902_ubuntu22
dpkg-deb -R codedeploy-agent_1.3.2-1902_all.deb codedeploy-agent_1.3.2-1902_ubuntu22
sed 's/Depends:.*/Depends:ruby3.0/' -i ./codedeploy-agent_1.3.2-1902_ubuntu22/DEBIAN/control
dpkg-deb -b codedeploy-agent_1.3.2-1902_ubuntu22/
sudo dpkg -i codedeploy-agent_1.3.2-1902_ubuntu22.deb
systemctl list-units --type=service | grep codedeploy
sudo service codedeploy-agent status
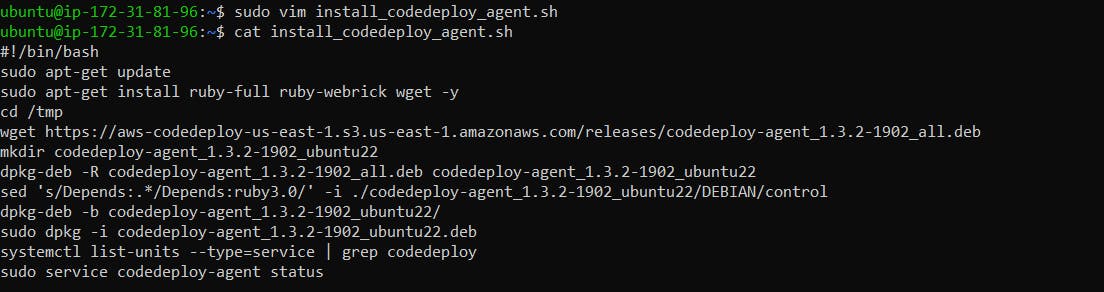
bash install_codedeploy_agent.sh
CodeDeploy agent is installed and running successfully.

Create an index.html file:
Task 2: Add appspec.yaml file to CodeCommit Repository and complete the deployment process.
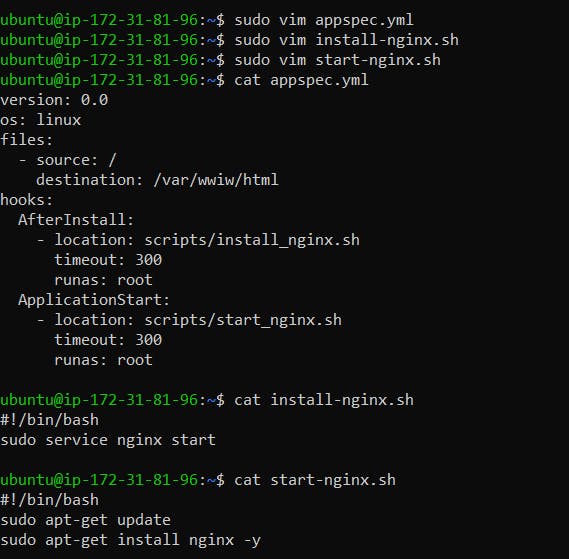
Let us create an appspec.yml file to deploy index.html on nginx;
version: 0.0
os: linux
files:
  - source: /
    destination: /var/wwiw/html
hooks:
  AfterInstall:
    - location: scripts/install_nginx.sh
      timeout: 300
      runas: root
  ApplicationStart:
    - location: scripts/start_nginx.sh
      timeout: 300
      runas: root
Push all the files :

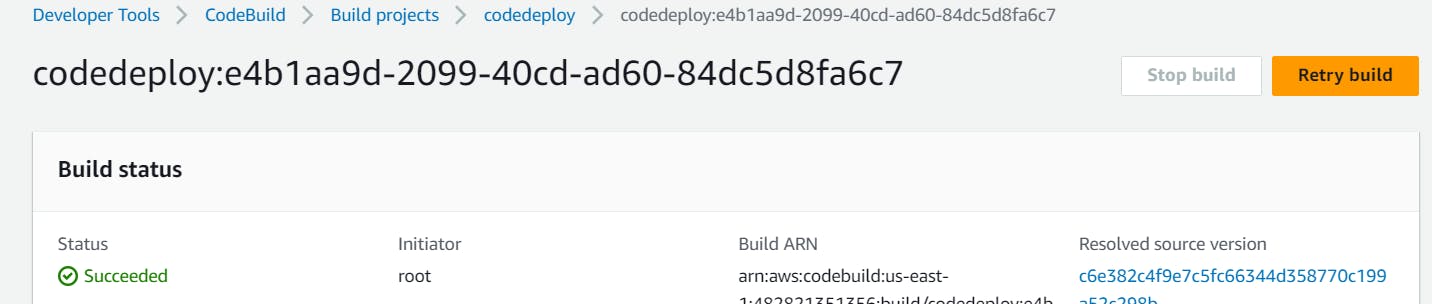
It's time to put CodeBuild to work and witness its prowess in action! When building your project, make sure to choose S3 as your Artifacts destination and don't forget to enable artifact packaging in .zip format. Get ready to witness the magic unfold!

Click on Create Build project.
Yayyyyy!!!!! You build it.
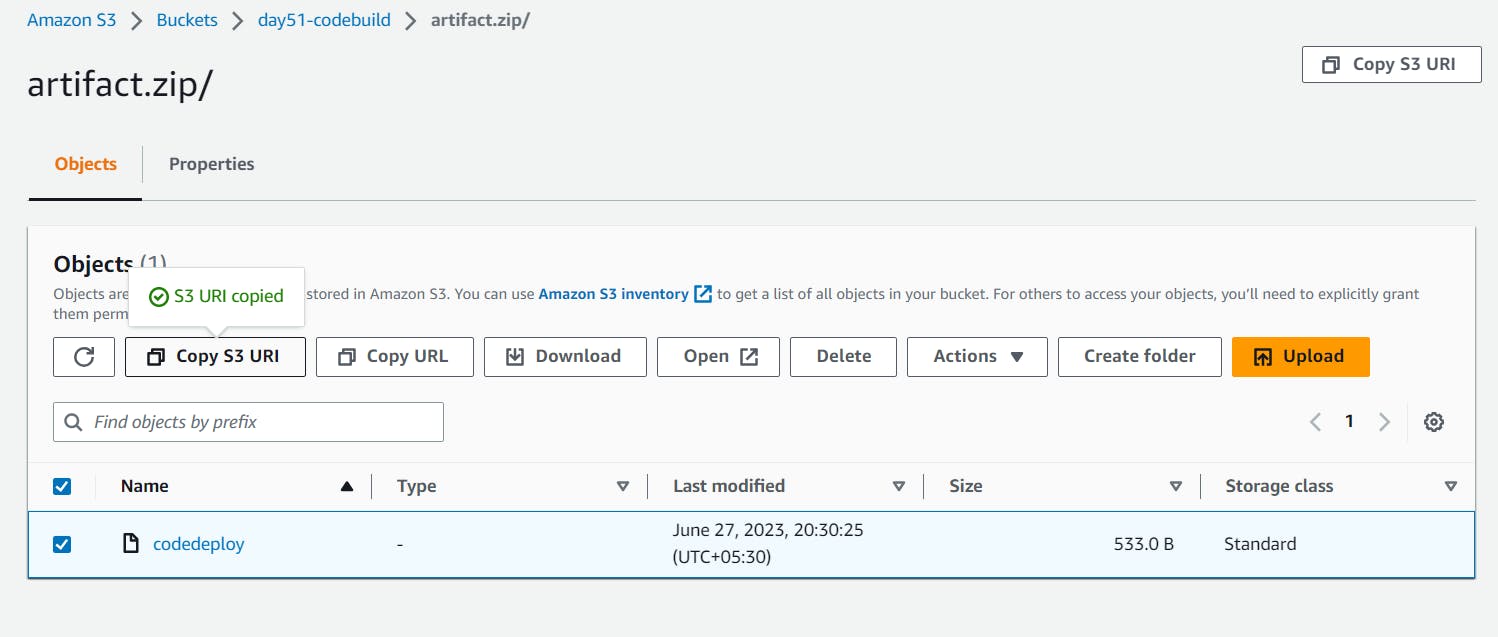
Navigate to your trusty Amazon S3 storage, where your precious .zip file is securely stored.

This role is a powerhouse, granting essential permissions to AmazonEC2FullAccess, AmazonS3FullAccess, and AWSCodeDeployFullAccess. With these superpowers, our EC2 instances, S3 buckets, and CodeDeploy service can collaborate like never before!
We have to attach this role to our EC2 instance.

All you need to do is paste that awesome S3 URL we talked about earlier. 📎 CodeDeploy will do the rest, effortlessly deploying your application content to your desired destination.

And now, the moment we've all been waiting for... Click on that magical "Create the Deployment" button!
Once the deployment sprinkles its success all over, it's time to bask in the glory of your achievement. Behold, the mesmerizing output file of index.html! 🌟
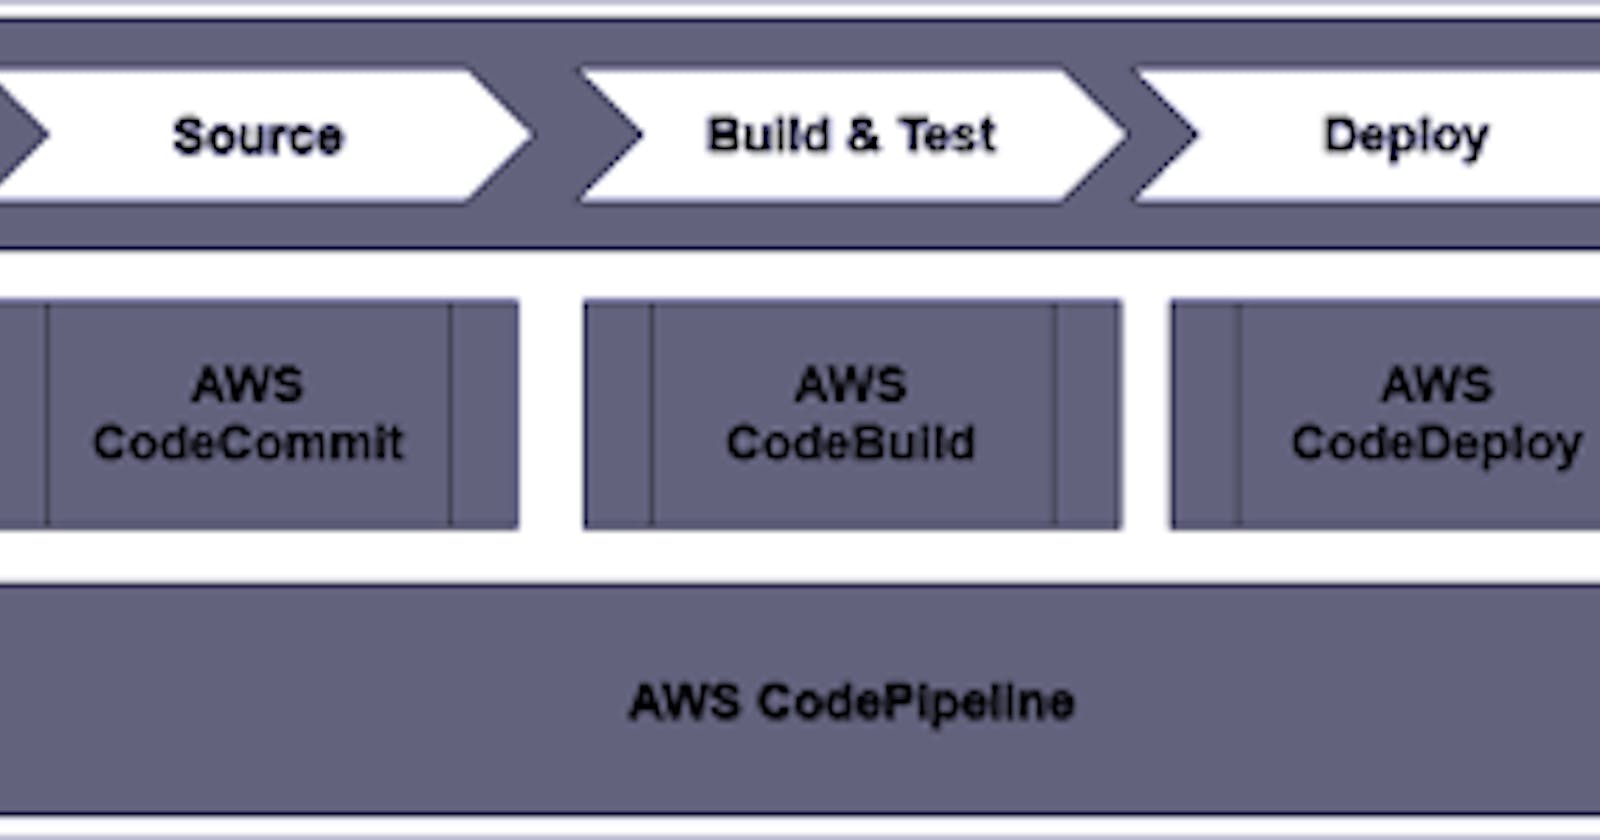
Conclusion :
In a nutshell, this blog is all about streamlining the deployment process with AWS services. We witnessed CodeCommit, CodeBuild, and CodeDeploy work together as a dream team, making application deployment a walk in the park.!!!!!
Stay tuned for more AWS adventures, as we unravel the world of cloud computing and embrace the future of software deployment! 🚀

To connect with me - Subho Dey