


Introduction
Amazon Elastic Compute Cloud (EC2) is a powerful cloud computing service that allows you to launch and manage virtual servers, known as instances, in the AWS cloud. In this task, we'll walk through the process of launching an EC2 instance using the AWS Management Console, connecting to it via SSH, installing a web server, and deploying a simple web application.
Step 1: Launching an EC2 Instance
Sign in to the AWS Management Console and navigate to the EC2 Dashboard.
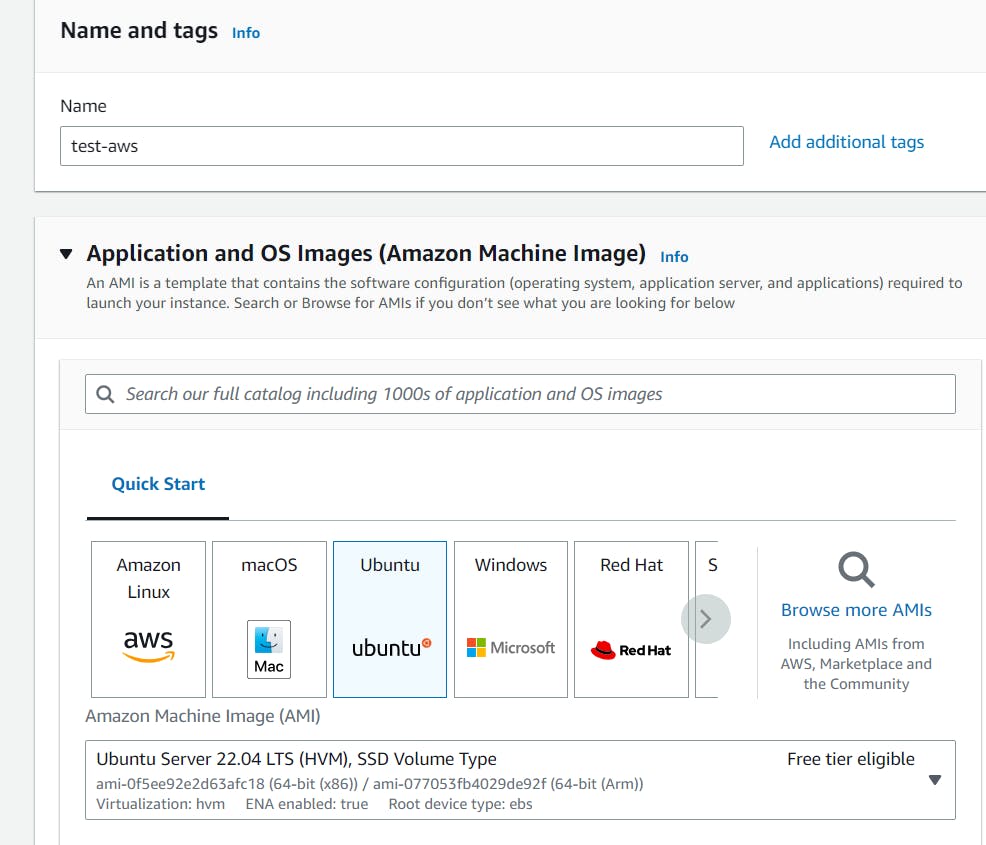
Click on "Launch Instance" and select an Amazon Machine Image (AMI) of your choice (e.g., Amazon Linux 2).
Choose an instance type based on your requirements and click "Next: Configure Instance Details."
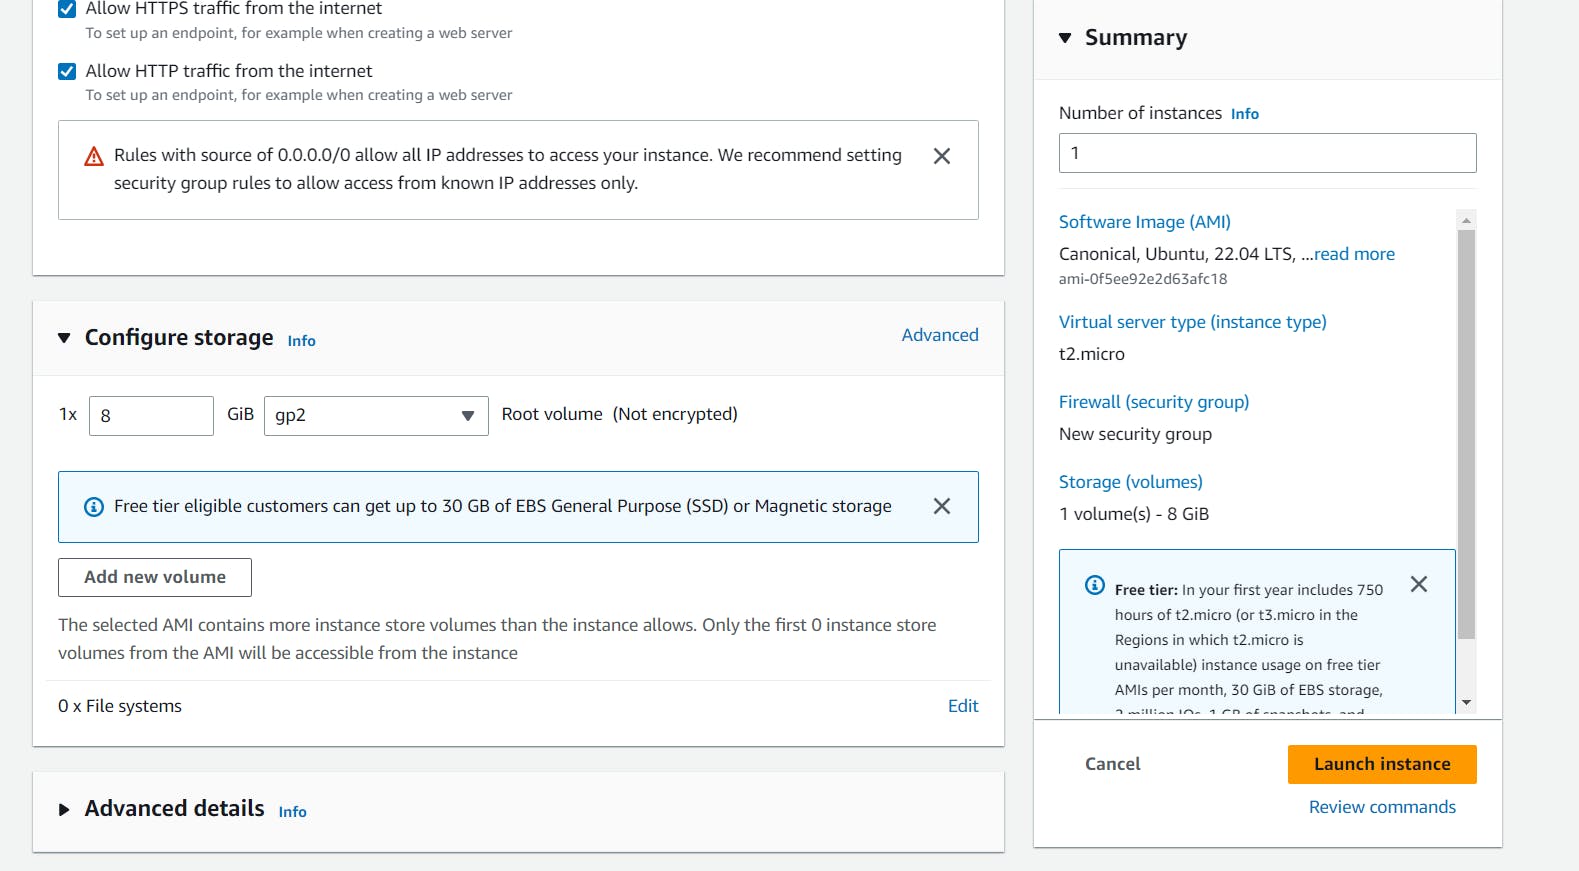
Configure the instance details (e.g., network, subnet, security group, etc.), and then click "Review and Launch."
Review your settings and click "Launch" to create the EC2 instance.
Step 2: Connecting to the EC2 Instance via SSH
Once the instance is running, select it from the EC2 Dashboard and note its public IP address or DNS name.
Open your terminal (for Mac and Linux) or use a tool like PuTTY (for Windows) to establish an SSH connection.
ssh -i /path/to/your/private/key.pem ec2-user@your-ec2-public-ip
Step 3: Installing a Web Server and Deploying a Web Application
Update the package list and install the Apache web server on the EC2 instance.
sudo yum update -y
sudo yum install httpd -y

- Start the Apache web server and enable it to start on system boot.
sudo service httpd start
sudo chkconfig httpd on
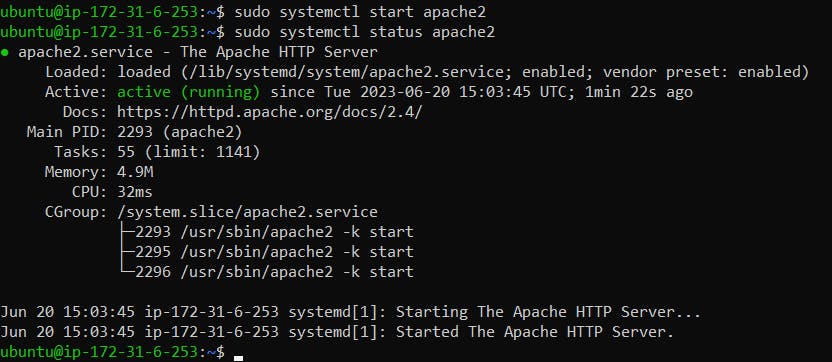
That's how We can connect to the server!
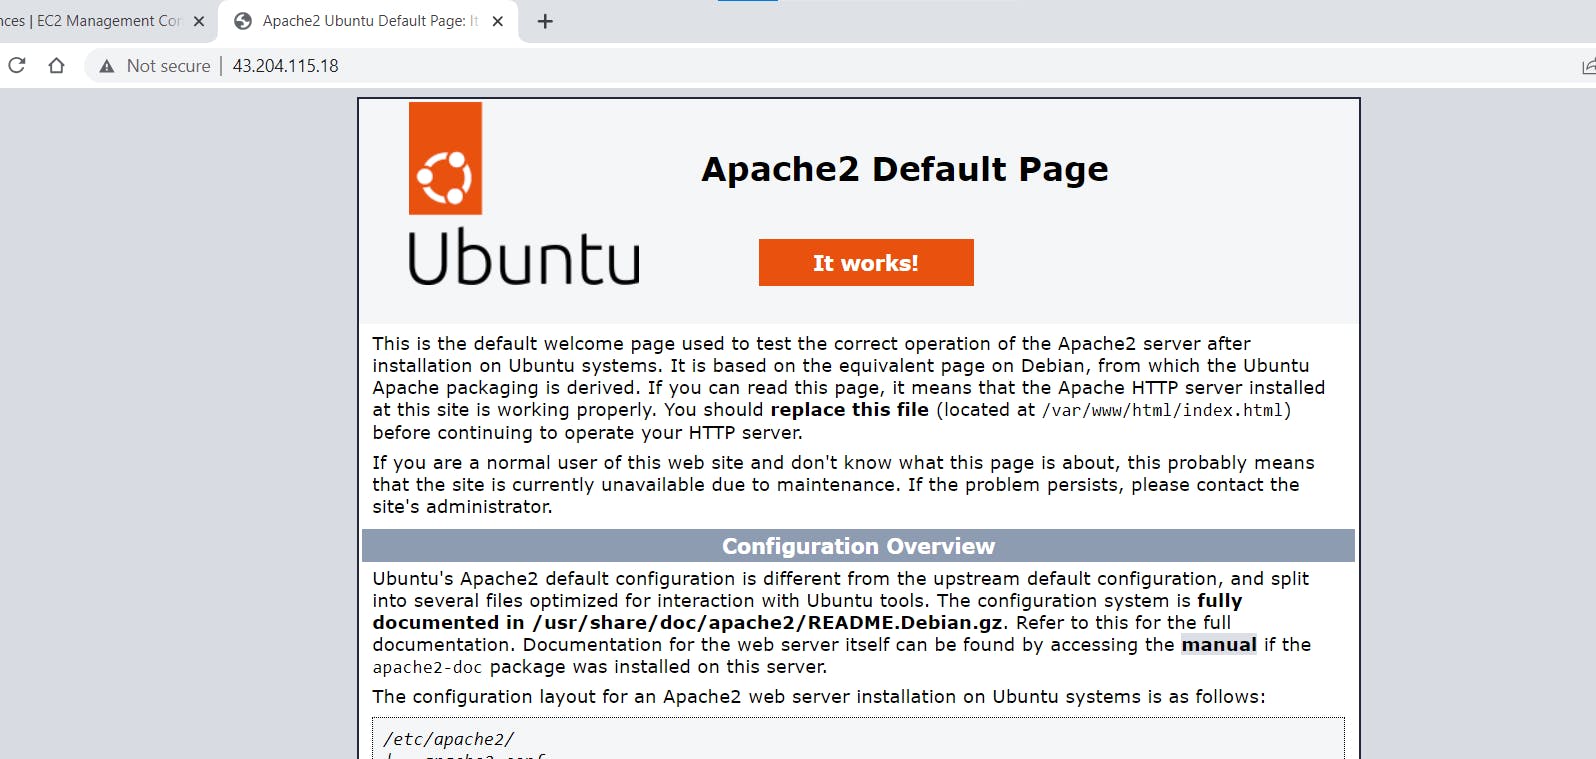
- Create a simple "index.html" file to deploy as the web application.
sudo echo "<html><body><h1>Hello, World!</h1></body></html>" > /var/www/html/index.html
- Verify that the web server is running by visiting your EC2 instance's public IP or DNS name in a web browser.
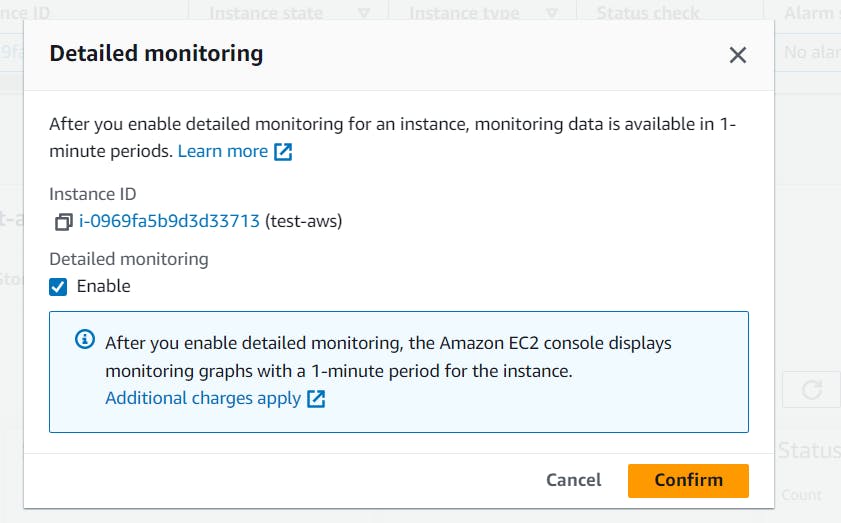
Step 4: Monitoring the EC2 Instance using Amazon CloudWatch
Amazon CloudWatch is a monitoring service that provides you with real-time insights into resource utilization and performance metrics for your AWS infrastructure.
Go to the CloudWatch Dashboard in the AWS Management Console.
Select "EC2" from the list of resources to monitor.
Click on "Create Alarm" to set up alarms for specific metrics (e.g., CPU utilization, network traffic, etc.).
Define the conditions for the alarm and configure actions (e.g., sending notifications via email) when the alarm state changes.
Task-02: Creating an Auto Scaling Group and Monitoring Instances
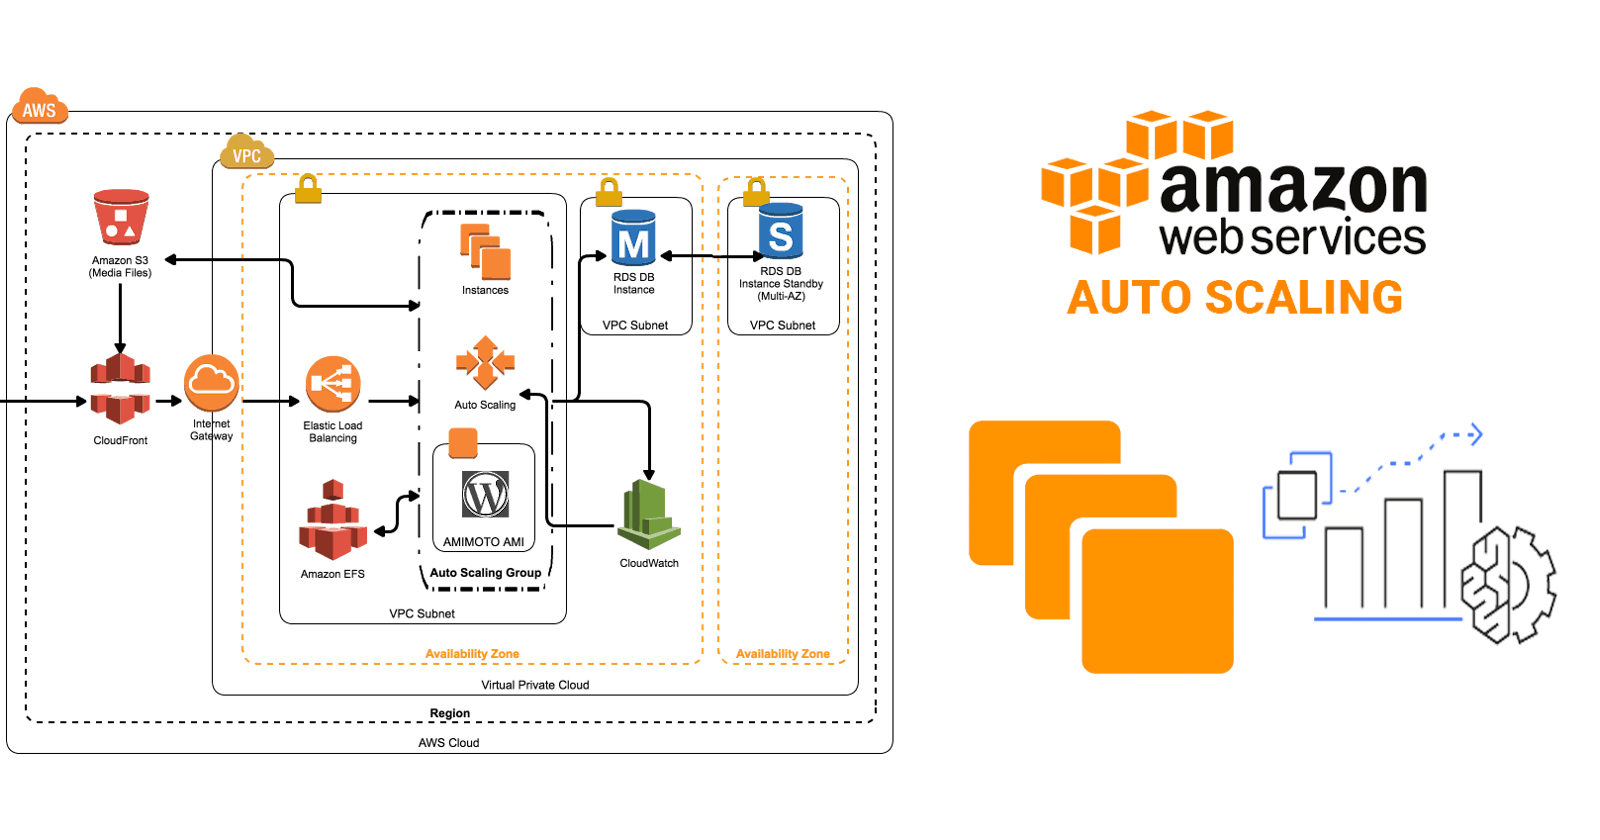
Auto Scaling is a feature in AWS that automatically adjusts the number of instances in an Auto Scaling group based on demand. In this task, we'll create an Auto Scaling group using the AWS Management Console, configure it to launch EC2 instances in response to changes in demand and use Amazon CloudWatch to monitor the performance of the group and its instances.
Step 1: Creating an Auto Scaling Group
Go to the EC2 Dashboard and click on "Auto Scaling Groups" in the left navigation pane.
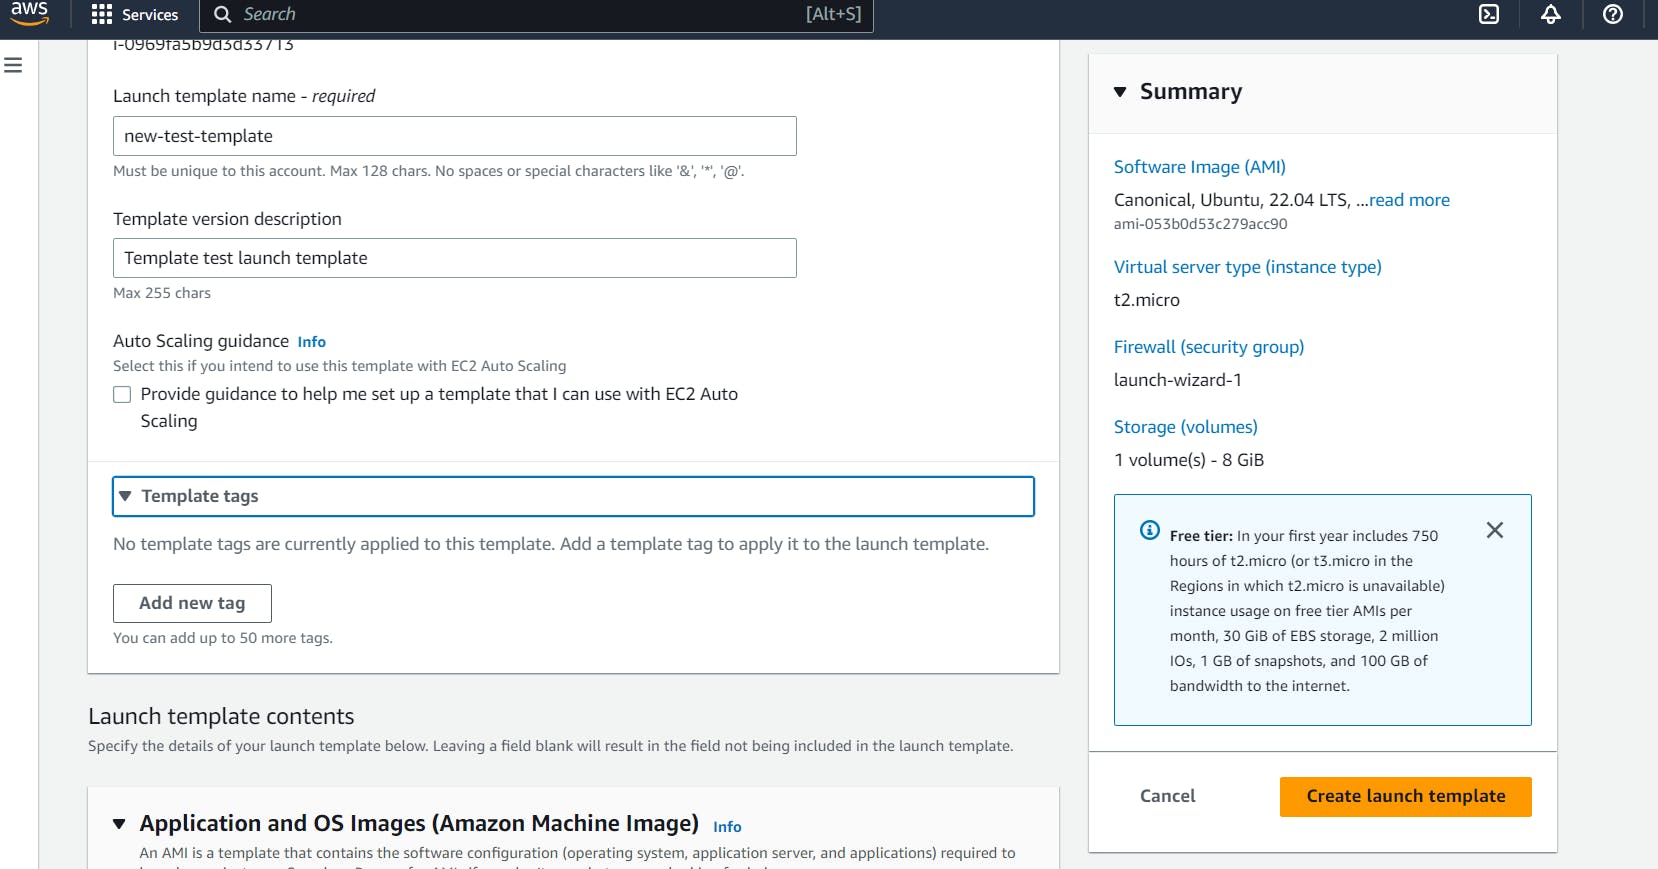
Click on "Create Auto Scaling Group" and configure the group settings (e.g., AMI, instance type, desired capacity, etc.).
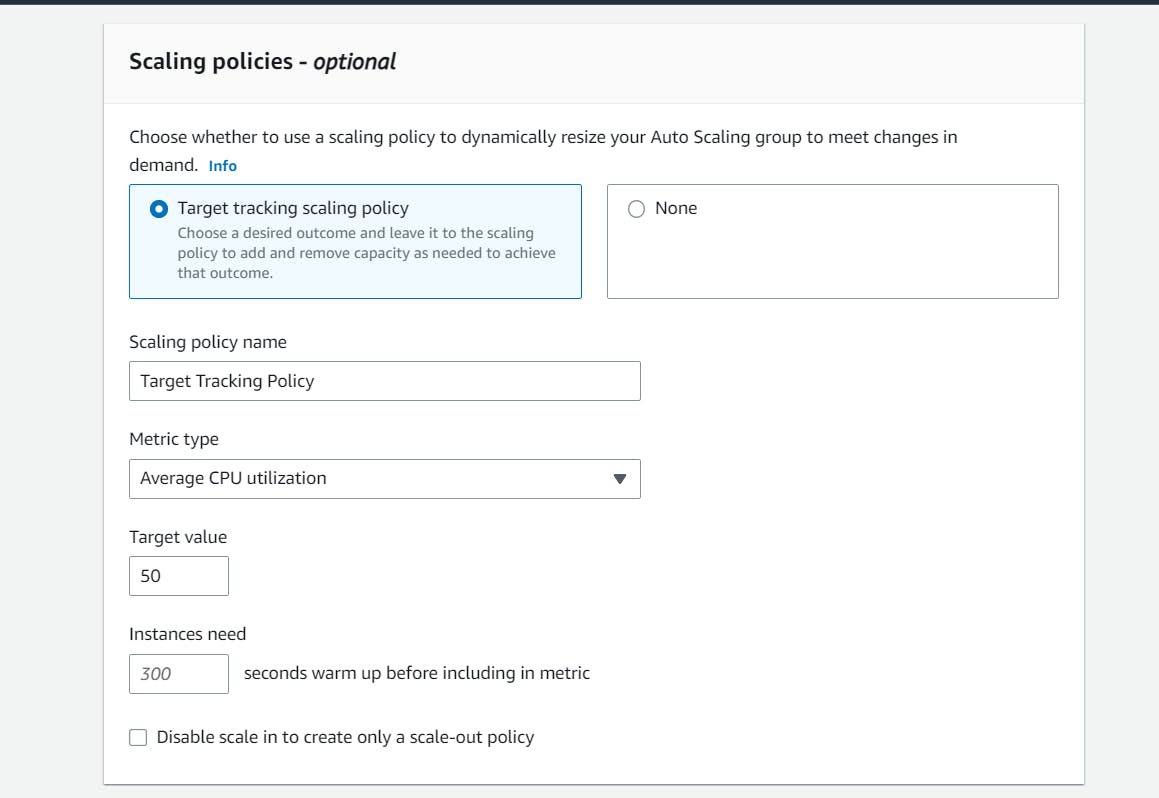
Set up scaling policies (e.g., target tracking scaling policy) to automatically adjust the number of instances based on metrics like CPU utilization or request count.
Step 2: Monitoring the Auto Scaling Group and EC2 Instances
Head to the CloudWatch Dashboard and select "Auto Scaling" from the list of resources to monitor.
Here, you can view various metrics related to your Auto Scaling group, such as the number of instances, average CPU utilization, and more.
Set up CloudWatch Alarms for critical metrics to get notified when specific conditions are met, allowing you to troubleshoot any issues promptly.
Step 3: Using the AWS CLI to Verify the Auto Scaling Group
The AWS Command Line Interface (CLI) allows you to interact with AWS services via the command line.
- Open your terminal or command prompt and configure the AWS CLI with your access credentials.
aws configure
- To view the state of your Auto Scaling group, use the following command:
aws autoscaling describe-auto-scaling-groups --auto-scaling-group-names YOUR_AUTO_SCALING_GROUP_NAME
- To verify the number of instances running in the Auto Scaling group, use the following command:
aws autoscaling describe-auto-scaling-instances --query "AutoScalingInstances[?AutoScalingGroupName=='YOUR_AUTO_SCALING_GROUP_NAME']"
And there you have it! This blog post covers two essential tasks in AWS: launching an EC2 instance with a web application and setting up an Auto Scaling group with monitoring. By following these steps, you'll gain valuable insights into deploying and managing scalable applications on the AWS cloud platform. Happy cloud!!!!!!!!!!!

To connect with me - https://www.linkedin.com/in/subhodey/