


Introduction:
In today's fast-paced world of software development, automating the build and deployment process is essential for delivering high-quality applications to end users quickly and efficiently. AWS CodeBuild, a fully managed build service provided by Amazon Web Services (AWS), comes to the rescue by streamlining the build, testing, and packaging of code. In this comprehensive guide, we'll delve deeper into the core features of AWS CodeBuild and walk you through the step-by-step process of building and deploying a simple web application using an Nginx server. Let's embark on a journey to harness the power of AWS CodeBuild and achieve seamless CI/CD automation!
Part 1: Understanding AWS CodeBuild
1.1 What is AWS CodeBuild?
AWS CodeBuild is a fully managed build service in the cloud that eliminates the hassles of provisioning, managing, and scaling your build servers. It is designed to cater to a wide range of projects and seamlessly integrates with other AWS services, making it a perfect choice for modern application development.
1.2 Key Benefits of AWS CodeBuild
Fully Managed: No need to worry about infrastructure management or server scaling; AWS CodeBuild handles it all.
Scalable: CodeBuild scales automatically based on your build needs, ensuring fast and efficient builds even for large projects.
Security: Built-in security features like encryption, AWS Identity and Access Management (IAM) integration, and secure artefact storage.
Flexible Environment: Choose from a variety of pre-configured build environments or create custom build environments to suit your project requirements.
Integration with CI/CD Pipelines: Seamlessly integrate CodeBuild with popular CI/CD tools like AWS CodePipeline, Jenkins, and more.
Part 2: Exploring the Buildspec File
2.1 The Importance of Buildspec in AWS CodeBuild
At the heart of AWS CodeBuild lies the Buildspec file, written in YAML format. The Buildspec defines the build process, including the series of commands that CodeBuild executes to build and package your application.
2.2 Anatomy of a Buildspec File
A typical Buildspec file comprises the following sections:
version: 0.2

phases:
  install:
    commands:
      - echo Installing NGINX
      - sudo apt-get update
      - sudo apt-get install nginx -y
  build:
    commands:
      - echo Build started on `date`
      - cp index.html /var/www/html/
  post_build:
    commands:
      - echo Configuring NGINX

artifacts:
  files:
    - "**/*"
In this example, we have defined four phases: install, build, and post_build. The install phase installs NGINX, the build phase copies the index.html file to the default web root directory for nginx, and the post_build phase performs any additional configurations required.
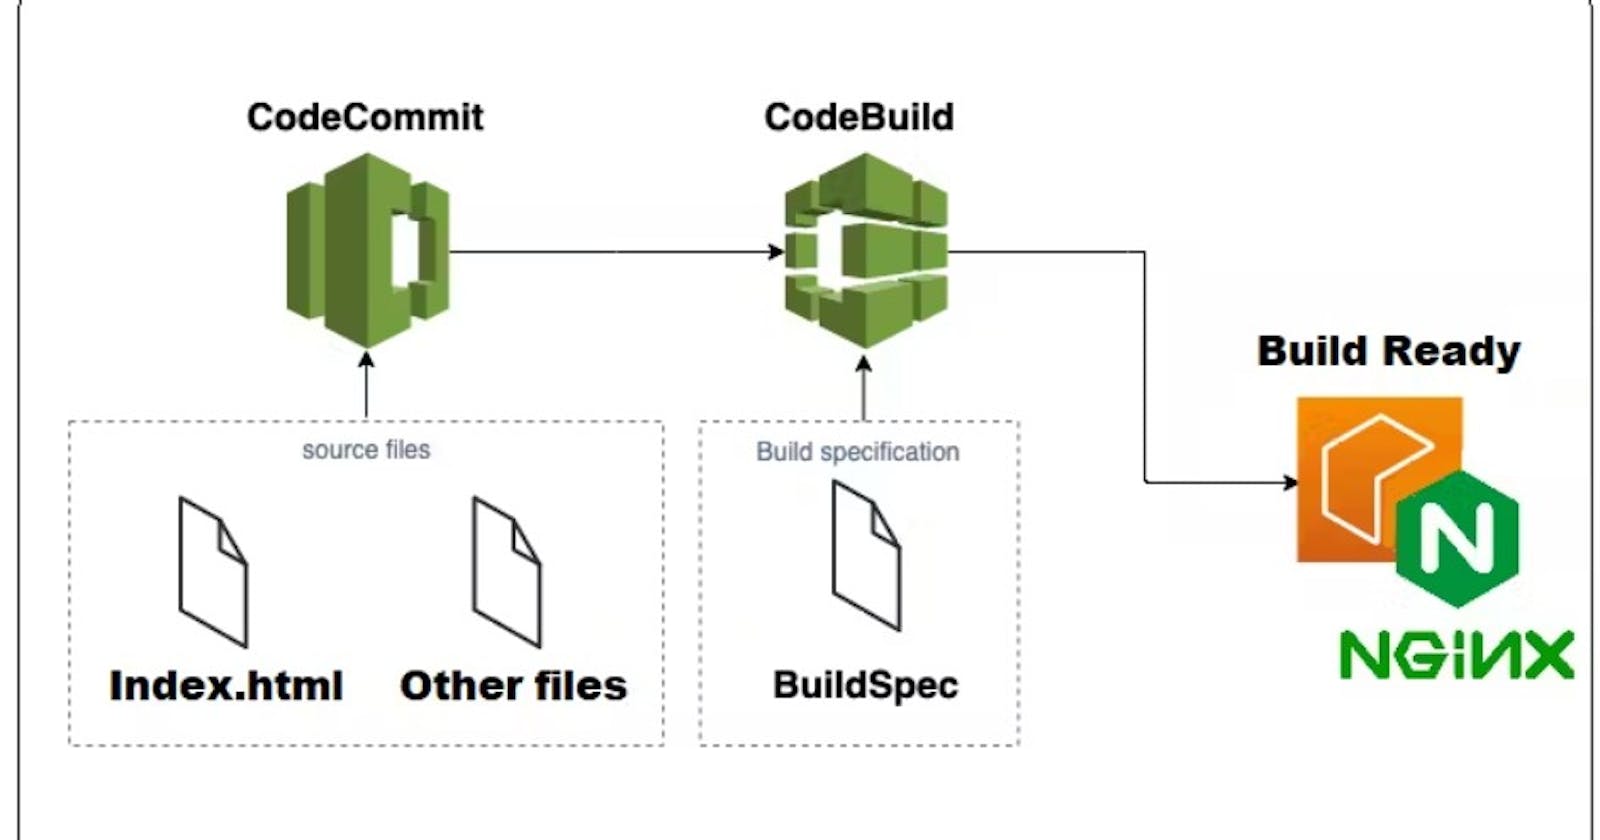
Part 3: Building a Simple Web Application with AWS CodeBuild
3.1 Creating the CodeCommit Repository and Index.html
To begin, create a CodeCommit repository to store your web application's source code. Clone the repository to your local machine using the Git clone command and create an index.html file inside the repository.

Copy clone HTTPS URL:
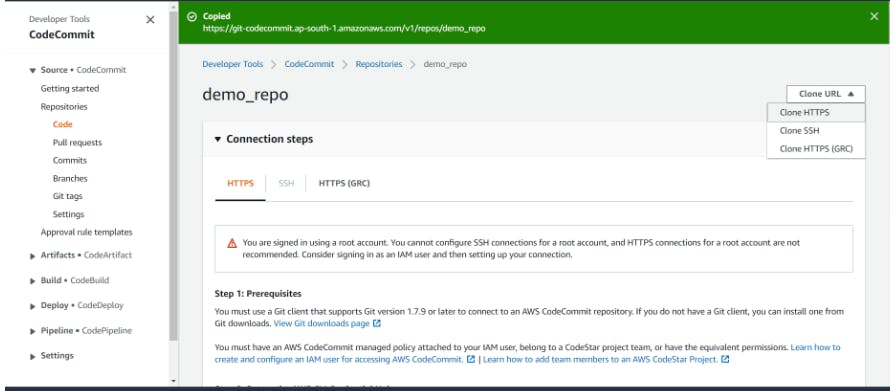
In git bash, clone the repository to your local machine using the git clone command. After completing all Push the changes to the repository using the git push command.
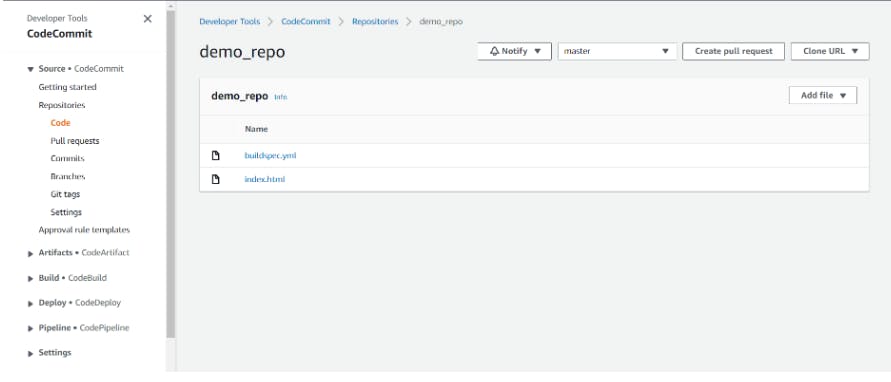
You will have a simple index.html and buildspec.yml file in your CodeCommit repository.
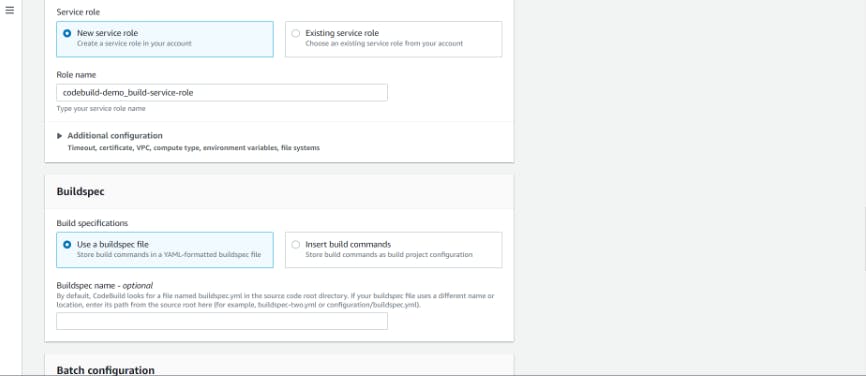
3.2 Setting Up the CodeBuild Project
Now, let's set up the CodeBuild project to build and package the index.html file using the defined Buildspec. Follow these steps:
- Go to the AWS CodeBuild service and click "Create build project."

- Provide details for the building project, such as the project name, source provider (CodeCommit), repository, and branch.

- Under the "Environment" section, choose the operating system, runtime, and image.

- Create a new service role and select "Use a buildspec file" in the "Buildspec" section.
- Click "Create build project" to create your project.
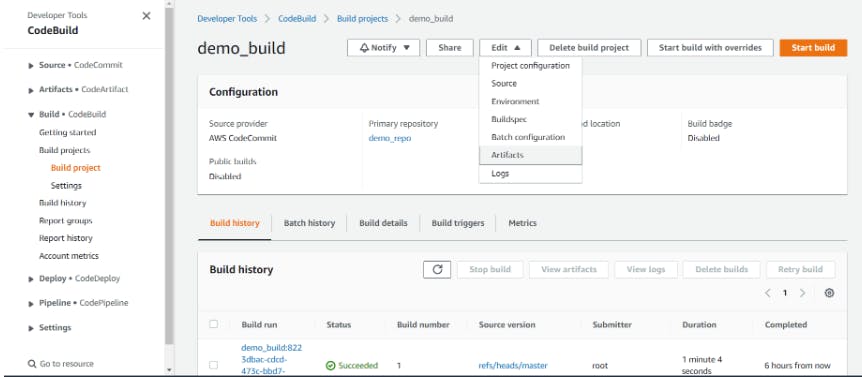
Part 4: Initiating the Build and Deploying the Artifact
With the CodeBuild project set up, click the "Start build" button to initiate the build process. CodeBuild will follow the instructions in the Buildspec file and build your index.html file using NGINX. Once the build is complete, the artifact will be available in the specified S3 bucket location.
Part 5: Enhancing CodeBuild with Artifact Storage
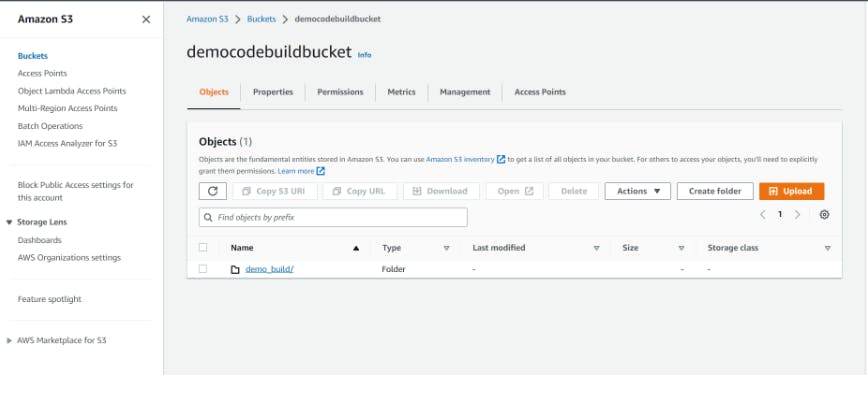
To store the artefacts generated during the build process, you can configure CodeBuild to upload them to an S3 bucket. Follow these steps:
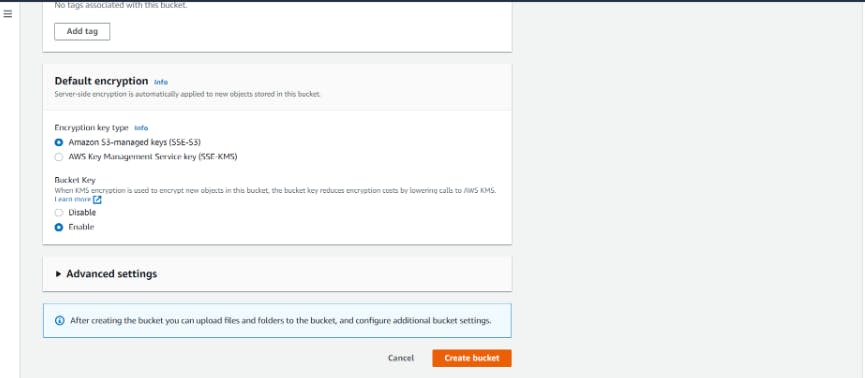
Create an S3 bucket to store the artefacts.
In the CodeBuild project settings, under the "Artifacts" section, select type "Amazon S3" and choose the bucket name created earlier.
- Click "Update artefacts" to save the changes.

Here is the output:

Conclusion:
In this comprehensive guide, we explored the world of AWS CodeBuild and its role in simplifying CI/CD automation. By understanding the importance of the Buildspec file, we successfully built and deployed a simple web application using an nginx server. AWS CodeBuild's fully managed nature, scalability, and seamless integration with other AWS services make it an indispensable tool for modern software development teams. As you continue your journey into the world of AWS and cloud-native development, harness the power of AWS CodeBuild to supercharge your CI/CD pipelines and deliver exceptional applications to your users. Happy coding and building!

To connect with me - https://www.linkedin.com/in/subhodey/