Introduction:
In today’s world, automation is everything. With the help of automation tools, we can save a lot of time, reduce human errors, and improve the overall quality of our work. One such tool is Jenkins, which is an open-source automation server that can help us automate our build, test, and deployment processes. In this blog post, we will discuss how to create a Jenkins pipeline to clone a private repository, build a Docker image, and run a container.
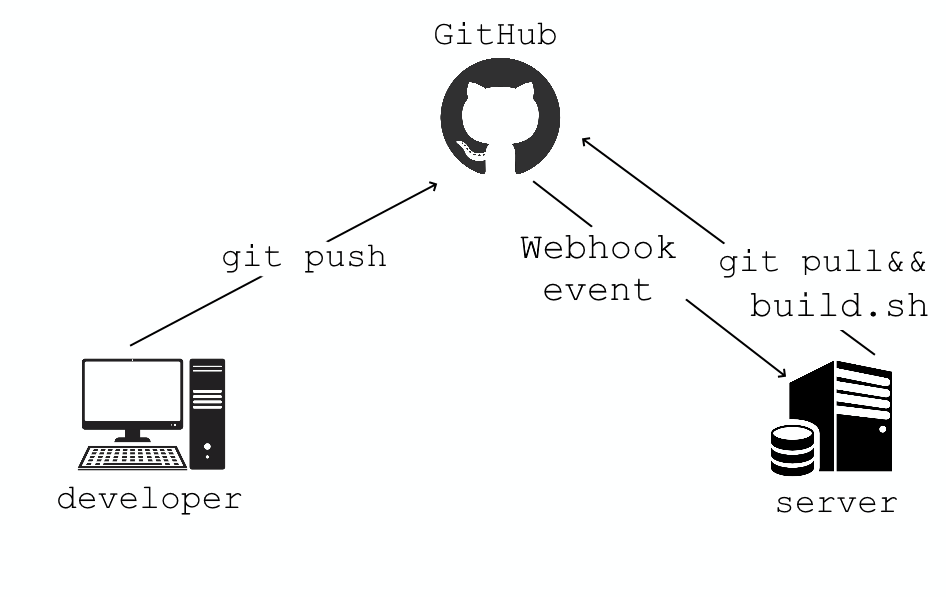
Integrating GitHub Webhooks with Jenkins to automate unit and integration tests after GitHub events for CI/CD
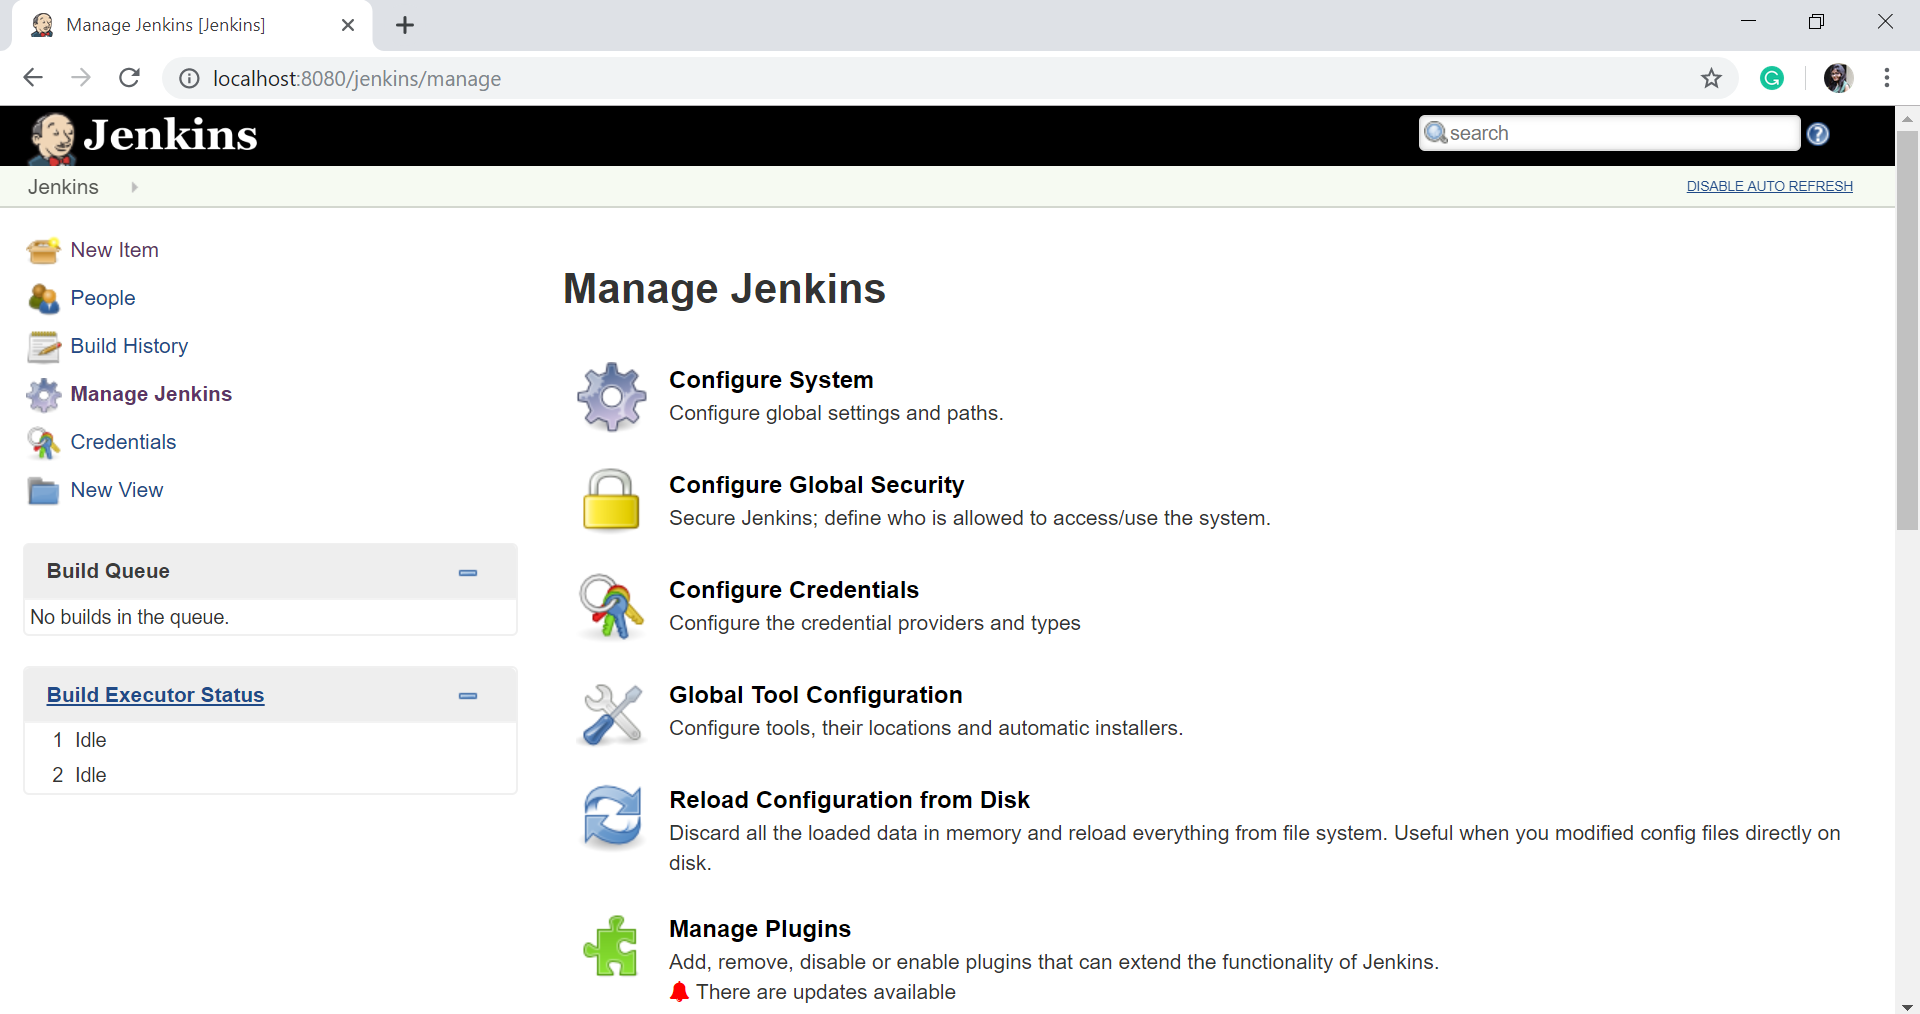
- Log in to Jenkins server :

- Create a Jenkins API Token :
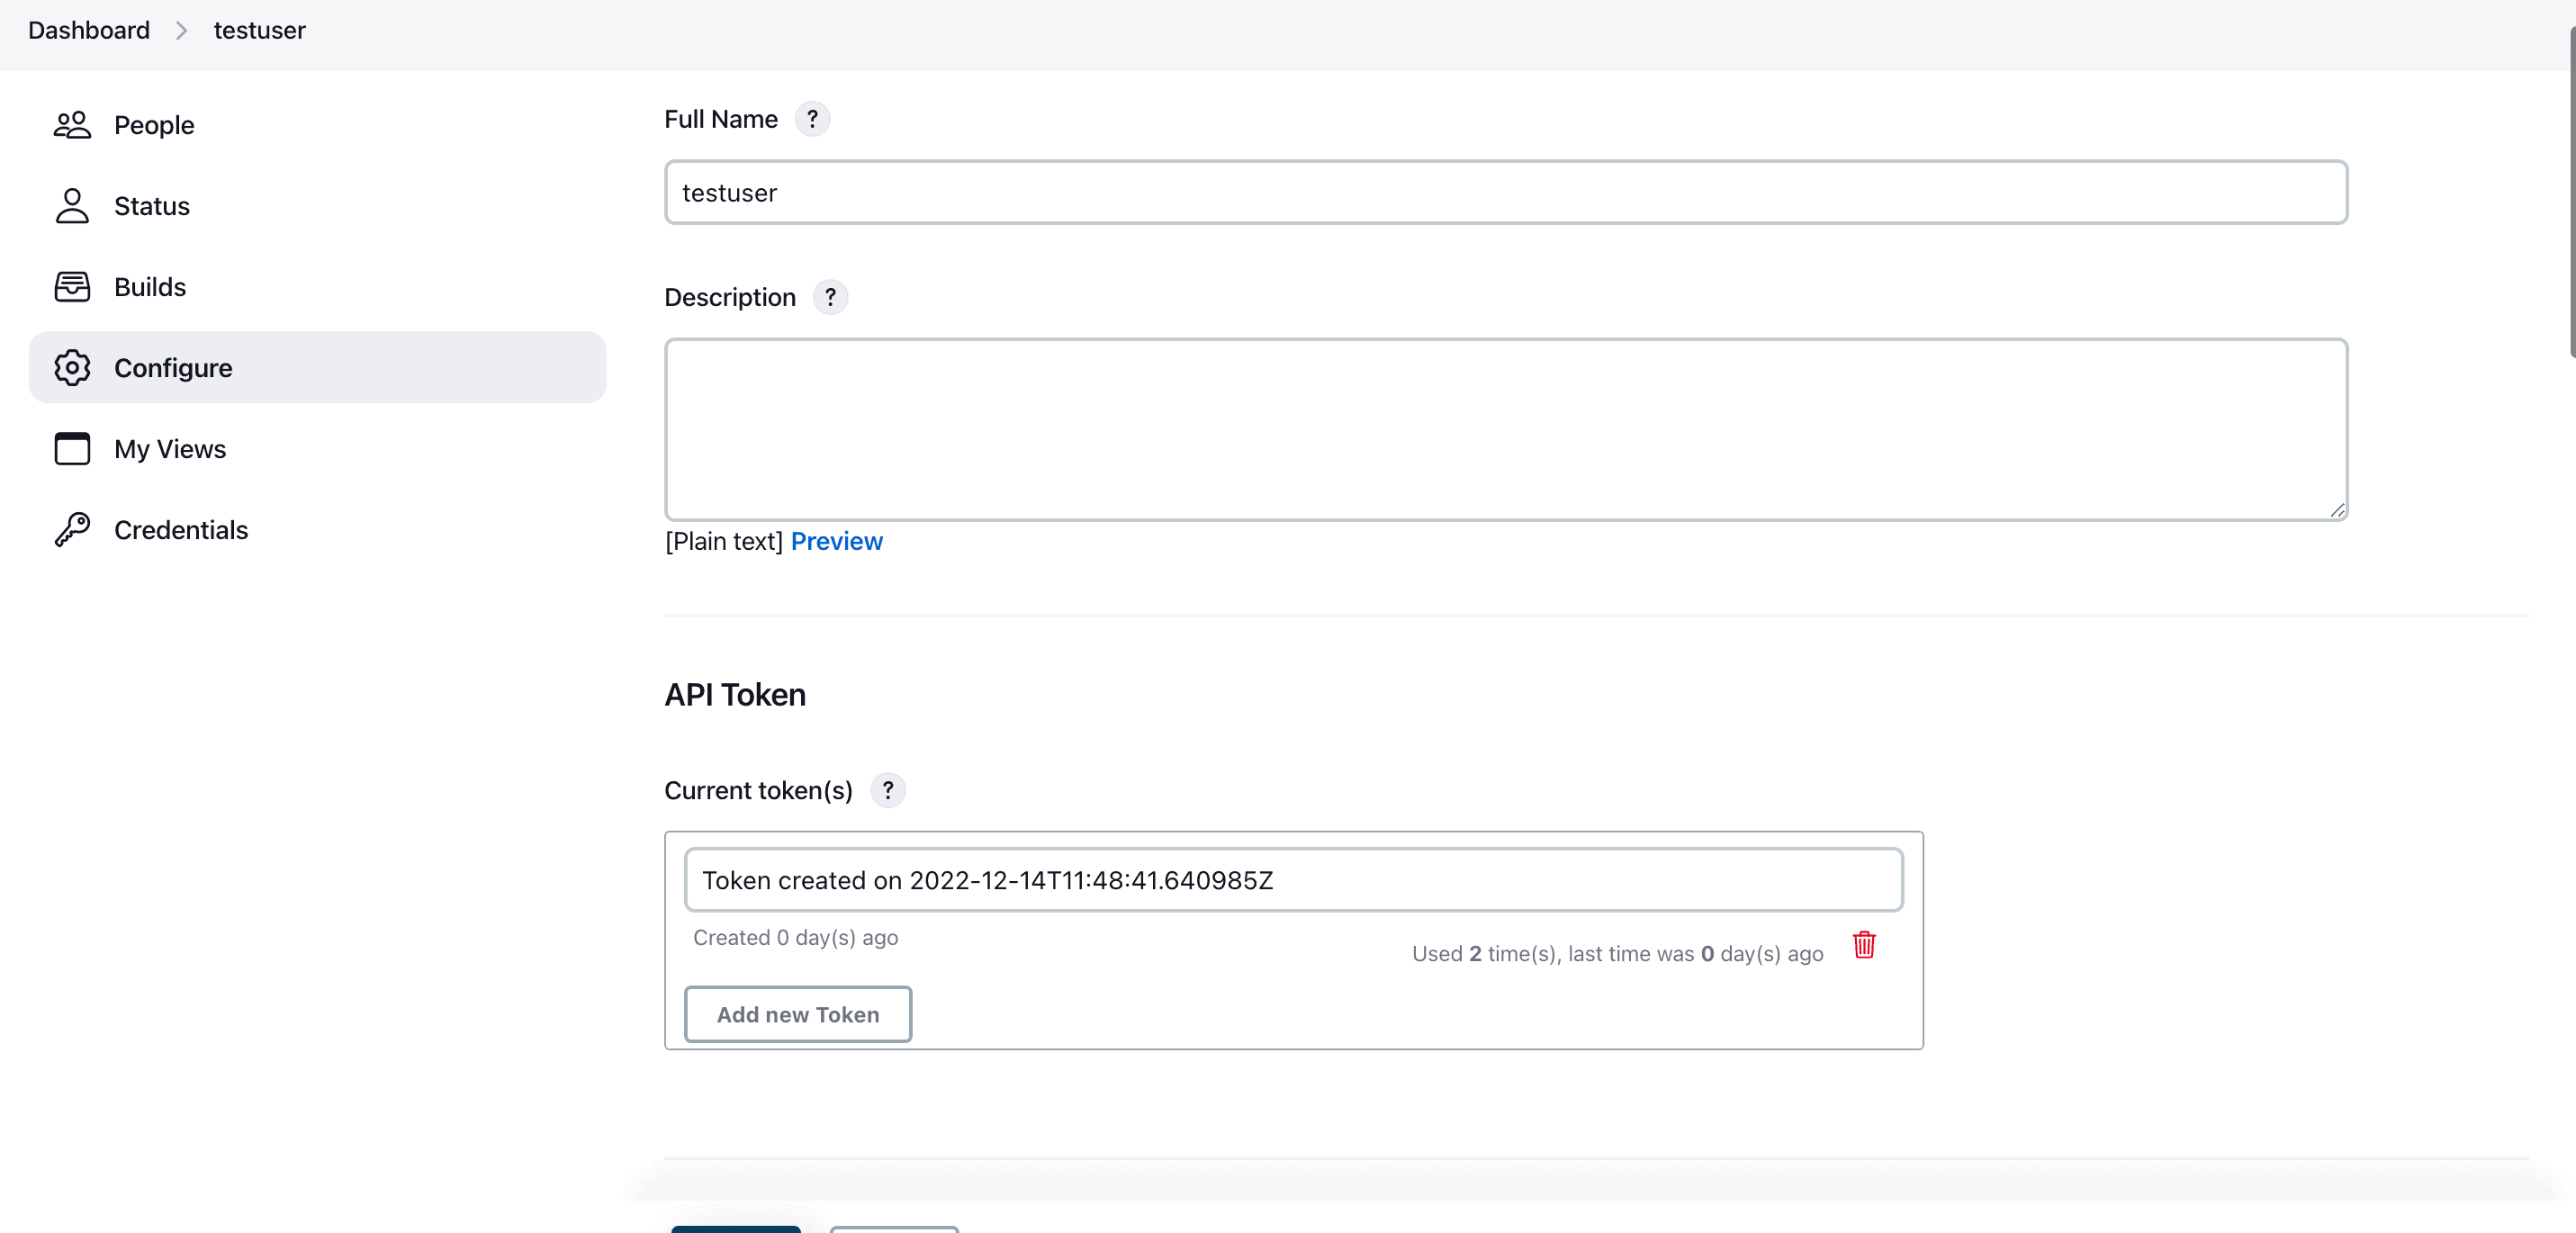
To connect Webhook to the Jenkins server, first, create an API Token to authenticate from the version control provider. You need to click on your account and then on the configure option.

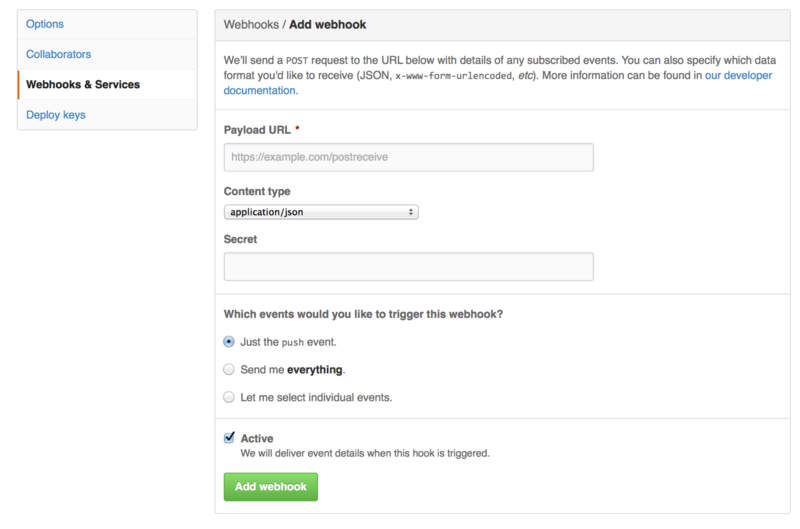
To configure a GitHub repository and create a GitHub webhook, follow these steps:
First, go to the GitHub repository you want to configure.
Click on the "Settings" tab located at the top right corner of the repository.
In the left sidebar, click on "Webhooks".
On the Webhooks page, click on the "Add Webhook" button.
Provide a name for your webhook in the "Payload URL" field. This name will help you identify the webhook in the future.
If you are using AWS CodePipeline with GitHub, the "Payload URL" will be provided by CodePipeline automatically.
Choose the type of events you want to trigger the webhook. You can select individual events or choose "Just the push event" for basic use cases.
Make sure the "Active" checkbox is selected to enable the webhook.
Optionally, you can configure other settings such as the content type and secret for the webhook.
Click on the "Add webhook" button to create the webhook.
Note: It's essential to store the generated webhook token in a secure place as it cannot be retrieved later unless you create a new one.
For testing purposes, you can fork a GitHub repository and use it as an example. One example repository you can use is "Node-todo" app.

With the webhook created, your GitHub repository will now trigger events to AWS CodePipeline whenever certain actions occur, such as a new commit or a push to the repository. This enables seamless integration between your GitHub repository and AWS CodePipeline for automated builds and deployments.

To access GitHub's API and authenticate from Jenkins, you need to create a GitHub Token. Follow these steps to generate a token:
Go to your GitHub profile.
Click on "Settings" to access your account settings.
From the sidebar, select "Developer Settings."
In the Developer Settings menu, choose "Personal access tokens."
Click on "Generate new token" to create a new token.
Provide a meaningful name for the token to identify its purpose.
Select the required scopes or permissions based on your use case.
Click on "Generate token" to create the token.
Once generated, copy the token and securely store it in a safe place.
This token will serve as your authentication method when accessing GitHub's API from Jenkins. It's crucial to keep this token secure, as it provides access to your GitHub account. Use the token in your Jenkins configuration to enable seamless communication with GitHub's API.
Configuration :
Now that we have our Jenkins server up and running on an AWS EC2 instance and have obtained a Jenkins API Token for authentication with the GitHub webhook, we are ready to configure Jenkins further. Our next step is to add GitHub credentials to Jenkins and create a pipeline that will run the tests defined in the Jenkins file from the remote GitHub repository.
To add the GitHub credentials to Jenkins, we need to navigate to the Jenkins web interface and access the Jenkins Credentials Manager. From there, we can create a new credential entry for our GitHub account. This will involve providing the appropriate GitHub username and password or personal access token, depending on your authentication method.

Once we have added the GitHub credentials, we can proceed to create the pipeline. In Jenkins, we will navigate to the main dashboard and select the "New Item" option to create a new Jenkins job. We will choose the pipeline type and give it a name.
In the configuration for the pipeline, we will specify the GitHub repository URL and select the appropriate credentials that we added earlier. This will allow Jenkins to access the repository and retrieve the Jenkins file.
Next, we will configure the pipeline to run the tests defined in the Jenkins file. This may involve setting up build steps, test frameworks, and any necessary environment variables or dependencies.
Once all the configuration is complete, we can save the pipeline and trigger a build. Jenkins will automatically fetch the Jenkinsfile from the GitHub repository, execute the defined tests, and provide feedback on the test results.
By configuring Jenkins in this way, we establish a seamless integration between our Jenkins server, the GitHub repository, and the Jenkinsfile. This enables automated testing and continuous integration for our project, ensuring that any changes made to the repository are thoroughly tested and validated.
To integrate GitHub with Jenkins, follow these steps:
Ensure that you have the GitHub plugin installed on Jenkins. If you installed all the recommended plugins during Jenkins installation, it should be available.
Go to the Jenkins dashboard and navigate to the GitHub section.
Click on "Add GitHub Server" or "GitHub Server" to configure the connection to your GitHub account.

In the credentials section, click on "Add" and select "Jenkins". A new window will open.
Select "Secret text" and enter the GitHub API token that you created previously.
Provide an ID and description for the credentials and click on "Add" to save them.
By following these steps, you will establish a connection between Jenkins and GitHub, allowing Jenkins to interact with your GitHub repositories and perform various actions during your CI/CD pipeline.

choose the branch and you are good to go!!!!
Click on Build the project and here it's running:
By integrating Jenkins with our GitHub repository, we gain the ability to track all webhook requests sent by Jenkins Pipelines. This allows us to monitor the communication between Jenkins and GitHub, ensuring that our pipelines are triggered correctly :

Conclusion :
In conclusion, by specifying the desired GitHub events and setting up a webhook, we can seamlessly integrate our Jenkins Pipeline with our remote repository. This integration allows for the automatic triggering of pipeline builds whenever new changes are pushed to the repository, facilitating an efficient CI/CD workflow.

To connect with me - https://www.linkedin.com/in/subhodey/

